Friday, August 31, 2012

Q&A: Inking Large Solid Stamps

Happy Friday! I've started working on some of the videos for the questions that you all have submitted recently via comments, email, Twitter and Facebook.

Today's video answers a question from Suzanne Dahlberg on inking large solid stamps.

"Do you have any tips on stamping large solid images? Best inks or techniques? Like the large rectangle images in the Season of Thanks stamp set."

In the video below, I share my inking method and my preferred inks. Getting a good impression will ultimately come down to personal preference and what each individual is comfortable with. Here, I'm sharing what works for me and my personal preferences. *Please excuse the horribly stained loved stamp.

Watch above or in HD at YouTube

I also created a card immediately following the Q&A. However, my camera stopped recording for one reason or another and I didn't notice until it was almost complete. So, no footage. And to be honest, I almost didn't share the card at all because I'm not really "feeling it". But decided I would anyway...good or bad, it is what it is. Right? ;)

Thanks for stopping by and I hope you have a fantastic weekend! A long one here in the states...woo hoo!

Thursday, August 23, 2012

Wplus9 Design Clips: Working with Patterned Paper

Hi guys! I've got a card and video to share with you today. Paper Crafts Magazine has been celebrating their latest special issue Card Design Handbook all week. It's a great issue and goes into detail on all of the technical design terms that explain the foundations of "good design". I've never really been one to follow rules just for the sake of following them. I usually start working and tweaking as needed by referring to the basic rules as a guide if something just isn't working. You can see a little more of my process in the video below:

Watch above or in HD at YouTube

The rule of "three" isn't something that I usually take literally. I tend to pay more attention to visual weight. For example, the blues in this card; they are represented 3 times, in the patterned paper in the background, in the light aqua in the second layer, and then again in a darker shade with the buttons in the foreground. I chose to go darker because I didn't want a huge contrast between the apple and buttons. I think they work more harmoniously together since they are both in the same depth of shade. Remember, matchy-matchy isn't always the best route. If you want to add instant interest, add something unexpected.

I used a classic rule of "framing" to draw attention to the focal point as well. This could fall under movement. The buttons lead your eye from either the top or bottom straight to the sentiment. Having the lighter mat helps to push the entire focal point to the front. Since the overall design is quite busy with a lot of pattern paper, I chose a muted color palette with just a few pops of brighter color to create a sense of balance in the overall design.

I hope at least a little bit of that made some sense. If not, please excuse my rambling! Quite frankly, I don't realize while I'm creating that there is that much thought going into it. But I guess once you step back and start analyzing it, there is. Or at least we can BS and make it sound that way! ;o)

Thanks for stopping by, and I hope you are having a great week. It's almost Friday!!! Woot, Woot!

Project Supplies

You're The Best
Stamps: Design Basics: Classroom Backgrounds, Class Act (Wplus9)
Ink: Riding Hood Red, Baja Breeze (Stampin' Up!); Tim Holtz Distress Ink in Antique Linen & Vintage Photo (Ranger)
Card stock: Oatmeal (Wplus9); Aqua Mist (Papertrey Ink)
Patterned Paper: Clippings (Basic Grey)
Tools: Clear Cut Stackers: Pinking Squares Die, Pretty Patches: Apple Die, Label Layers 2 Die (Wplus9); buttons (Papertrey Ink); crochet thread

Sunday, August 19, 2012

Wplus9 Tips & Tricks: Separating Your Dies

The other day, I mentioned that I was editing a quick tip video on separating our dies. As promised, here it is!

Watch above or in HD at YouTube

This is a short, to the point video covering a frequently asked question on separating our dies. I go over which dies to separate and how, as well as which dies we do not recommend you separate. I've also included a tip or two on die cutting in general.

Thanks for stopping by!

Wednesday, August 15, 2012

A Closer Look: Clear Cut Stackers

Hi guys! There's a new video up! Today I wanted to share a quick intro video to our Clear Cut Stackers dies.

Watch above or in HD at YouTube

I'm also editing a short video on how to separate our dies, so be on the look out for that one soon! Thanks for stopping by and have a wonderful day!

Thursday, August 9, 2012

August/September 2012 Release Day Group Post

It's Release Day! All of our Aug/Sept 2012 products are now available for purchase at www.wplus9.com. If you missed the release, you can start here to catch up. And don't forget to check the winner's page to see if you were a lucky prize package winner!

Release Day is also Group post day. Release Day is reserved with one last parting project from each of the ladies that I get the pleasure of showcasing.

Seriously. What's not to love here? Jean's serving up a wheel barrow of fun in a great birthday card perfect for all ages if you ask me. Featuring: Happy Harvest & Happy Harvest Die, Country Charm, Quilt Cuts 1 Die, and A Pocketful.

A clever use of what would be scraps, I love the "flower" Kerrianne's created. Featuring: Quilt Cuts 1 Die and Happy Harvest.

Per Jinny's tell-tale style, it's the little details that make this card! The red stitching and little corner ties really add to the quilt feeling of her background. Featuring: Country Charm, Clear Cut Stackers: Pinking Squares, Happy Harvest, Happy Harvest Die, Pretty Patches: Apple, and Pretty Patches: Apple Die.

I am just in love with Elise's background stamping on today's card! Featuring: Happy Harvest, Country Charm, Label Layers 4 Die, Circle Stackers 1 Die, Pretty Patches: Pumpkin, and Pretty Patches: Pumpkin Die.

I am constantly in awe of Cristina's masking skills. I just adore her spotlight of pattern using Country Charm. Featuring: Country Charm, Folk Art Florals Die, and Pretty Patches: Apple.

Love the deconstructed layout, the fresh bold colors against the crisp white, and the clever use of scraps featured in this little number. Featuring: Clear Cut Stackers: Pinking Squares, Pretty Patches: Apple, Pretty Patches: Apple Die, and Pretty Patches: Pumpkin.

Maureen blew us all away this week, and today is no exception! I have enjoyed her creations so much for some time now, and it was incredible having her join us for this release. Thank you so much Maureen for making Wplus9 look so good! Featuring: Happy Harvest, Happy Harvest Die, Country Charm, Clear Cut Stackers: Pinking Squares, Mother's Day Bouquet, and Defining Words.

And that wraps up our Aug/Sept Release! As always, I can't say it enough - a great big THANK YOU to all of you for all of your support and encouragement.

Wednesday, August 8, 2012

Aug/Sept 2012 Release Full Reveal

It's time for the full reveal! Time to show you the sets we are releasing this month in their entirety. All products will be available for purchase tomorrow, on August 9th at www.wplus9.com.

Happy Harvest

Details

  • is a 6x8 clear photopolymer stamp set
  • 31 high quality photo-polymer stamps; 18 scene building images and 13 sentiment builders
  • will be available for purchase August 9th for just $21

Happy Harvest Companion Die

Details

  • coordinates with the Happy Harvest stamp set
  • seven separate dies wired together that can be easily snipped and separated
  • (A) - 2 7/8" wide x 1 1/8" tall, (B) - 1 5/16" wide x 1" tall, (C) - 1" wide x 5/8" tall, (D) - 2 1/4" wide x 2 5/8" tall, (E) - 3/4" wide x 3/4" tall, (F) - 1" wide x 3/4" tall, (G) - 3/4" wide x 3/4" tall
  • will be available for purchase August 9th for $14

Country Charm

Details

  • is a 4x6 clear photopolymer stamp set
  • 6 high quality photo-polymer stamps; 3 square patterned "patches" and 3 background building strips
  • will be available for purchase August 9th for $14

Clear Cut Stackers: Pinking Squares

Details

  • cuts 4 graduated pinked edge squares in the following sizes: 2 1/2", 2", 1 1/2", and 1"
  • 4 separate dies
  • all but the smallest image is backed by a clear acetate backer marked with a center registration point
  • gently remove white backer paper on each die before use
  • will be available for purchase August 9th for $12

Quilt Cuts 1 Die

Details

  • cut quilting patterns quickly and easily
  • 3 separate dies wired together that can be easily snipped and separated
  • (A) - 2 1/8" wide x 2" tall, (B) - 1 3/8" wide x 2" tall, (C) - 1 3/4" wide x 1 3/4" tall
  • will be available for purchase August 9th for $16

Pretty Patches: Apple

Details

  • is a 3"x4" clear photopolymer stamp set
  • 5 high quality photo-polymer stamps; 3 images and 2 sentiments
  • will be available for purchase August 9th for $6

Pretty Patches: Apple Companion Die

Details

  • coordinates with the Pretty Patches: Apple stamp set
  • 2 separate shapes contained on one die
  • will be available for purchase August 9th for $4

Pretty Patches: Pumpkin

Details

  • is a 3"x4" clear photopolymer stamp set
  • 5 high quality photo-polymer stamps; 3 images and 2 sentiments
  • will be available for purchase August 9th for $6

Pretty Patches: Pumpkin Companion Die

Details

  • coordinates with the Pretty Patches: Pumpkin stamp set
  • 5 high quality photo-polymer stamps; 3 images and 2 sentiments
  • will be available for purchase August 9th for $4

As always, I want to thank you for joining us for another release and for your sweet comments! How about one more giveaway? Want to win the entire release? Just leave a comment by 10:00 PM EST TONIGHT August 8th to enter. I will select one random winner from all comments. Winners will be posted here by 11:00 PM EST. Good Luck!

Don't forget, the store will be down from approximately 11:00 PM EST tonight until 12:00 AM EST while I upload and test all of the new products. Everything will be available and ready for purchase by 12:01 AM EST August 9th.

Tuesday, August 7, 2012

August/September 2012 Release Day 3

It's day 3 of our August/September Release! First, I would just like to say a great big thank you to the overwhelming response so far. You guys are leaving such amazing comments and showing such enthusiasm for this release, and I just wanted you to know how much I appreciate the kind words. Seriously. Now, if you are just joining us, you can always catch up back at Day 1.

Our final products of the release are little ones, but big on style. I say this because, I seriously think I used one of these two stamp sets on almost every project this release! So let me formally introduce Pretty Patches: Apple and Pretty Patches: Pumpkin, and their companion dies.

Pretty Patches: Apple

  • is a 3"x4" clear photopolymer stamp set
  • 5 high quality photo-polymer stamps; 3 images and 2 sentiments
  • will be available for purchase August 9th for $6
Pretty Patches: Apple Die

  • coordinates with the Pretty Patches: Apple stamp set
  • 2 separate shapes contained on one die
  • will be available for purchase August 9th for $4

Pretty Patches: Pumpkin

  • is a 3"x4" clear photopolymer stamp set
  • 5 high quality photo-polymer stamps; 3 images and 2 sentiments
  • will be available for purchase August 9th for $6
Pretty Patches: Pumpkin Die

  • coordinates with the Pretty Patches: Pumpkin stamp set
  • 2 separate shapes contained on one die
  • will be available for purchase August 9th for $4

These sets are the first two in a series of $6 sets. Now if you've been around Wplus9 long, you probably have caught on that I will add or cut a heart out of anything! Hearts just make everything better. Don't they?

For this country beauty, I started by die cutting my apple and leaf and stamping them with the coordinating images in Pretty Patches: Apple and matting it on, you guessed it, a pinking square! I stamped the matching heart in the center. One great thing about this series is that all of the hearts are the same size, so you can mix and match them between sets for even more pattern possibilities.

The gingham background was created using the solid stripe from Country Charm. It reminds me of a picnic blanket, doesn't it? I really love the sentiments is these sets, so classic and timeless.

A doily, some buttons, a lot of distressing and a couple of red stitches bring this card full circle.

Next, let's take a closer look at Pretty Patches: Pumpkin. I took a more simple and rustic approach for this card.

Again, I started by die cutting the pumpkin and leaf and stamping with them with the matching images. For the back panel, I stamped the checkerboard pattern from Country Charm across the top and bottom. I added the little leaves from Season of Thanks and some "berries" from Spring Tags.

This sentiment is probably my favorite. I think it's pretty universal for the whole holiday season. From Thanksgiving through New Years. I can see myself using it quite a bit.

And finally, my last card for today is also my favorite. It is an almost monochromatic card. I just love mix shades of white, cream, and brown together.

I cut several 1" pinking squares and a 2" pinking square. I stamped 5 of them 1" squares with the hearts from both of the Pretty Patches sets and arranged all of the squares in a grid.

To create the little house embellishment, I used the Folk Art Florals Die and placed a little wooden heart in the center. To create the "wings", I used the base layer from the Layered Butterfly Die and covered it in glitter. Oh, yes...I got over my fear of glitter! Although I don't know if that is a good thing, or a bad thing!

the sentiments on the front and inside are both from Pretty Patches: Pumpkin. I thought the sentiment was perfect for the little house embellishment.

I hope you have enjoyed today's samples! Oh..but wait, there's more! The Design Team has tons of stuff to share with you as well!

I have really enjoyed reading all of your comments and seeing so many new names during this release! I can't wait to share the full reveal with all of you tomorrow. But for now, would you like to win Pretty Patches: Apples, the Pretty Patches: Apple Die, Pretty Patches: Pumpkin, and the Pretty Patches: Pumpkin Die? Just leave me a comment by 9:00 AM EST August 8th to enter. I will select one random winner from all comments. Winners will be posted here.

Monday, August 6, 2012

August/September Release Day 2

Welcome back to day 2 of our August/September Release! If you are just joining us, you can catch up with Day 1. Today, we are focusing on a hot hot trend that I've noticed creeping it's way into paper crafting. The quilt craze! Have you noticed? More and more geometric shapes and patterns, mixed with pinked edges and those cozy fabric patterns. I for one, couldn't be happier about it and am excited to introduce today's line up.

Country Charm

  • is a 4"x6" clear photopolymer stamp set
  • 9 high quality photo-polymer stamps; 3 square patterned "patches" and 3 background building strips
  • will be available for purchase August 9th for $14
Clear Cut Stackers: Pinking Squares

This month we are introducing our Clear Cut Dies. This design allows us to bring you graduated sizes of simple shapes at an economical price. The centers of all but the smallest image are backed by a clear acetate, allowing you to see directly through the die while cutting! The center point is even marked with a registration mark to assist with centering images.

  • cuts 4 graduated pinked edge squares in the following sizes: 2 1/2", 2", 1 1/2", and 1"
  • 4 separate dies
  • will be available for purchase August 9th for $12

Quilt Cuts 1

  • cut quilting patterns quickly and easily
  • 3 separate dies wired together that can be easily snipped and separated
  • will be available for purchase August 9th for $16

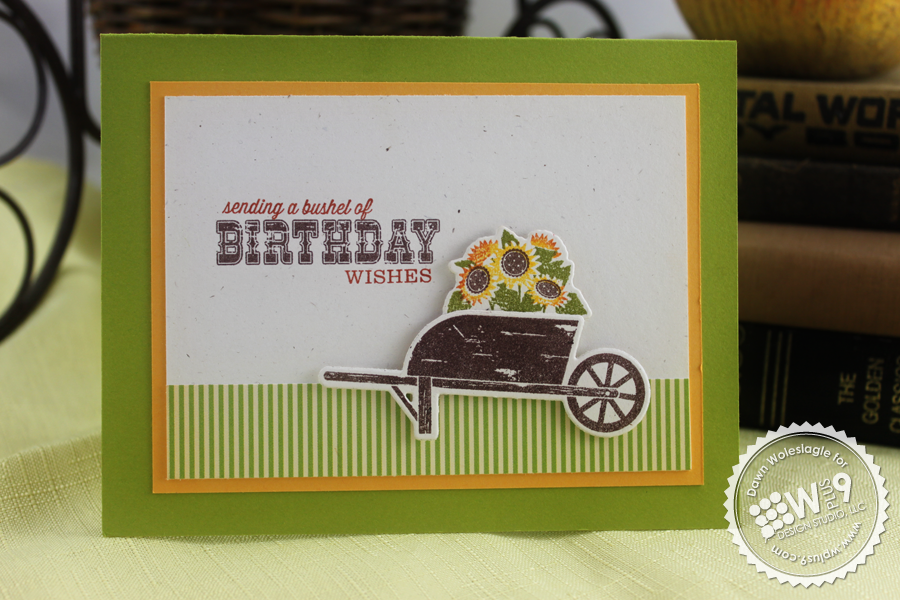
I knew immediately that I wanted to recreate a quilt square on at least one project this month. Here, I've employed the help of Quilt Cuts 1.

I started by die cutting one of the quilt patterns from 3 sheets of patterned paper. I was able to cut two patterned papers at once so it went super fast. I alternated the patterns until I came up with a design that I liked and matted it using the 2.25" pinking square.

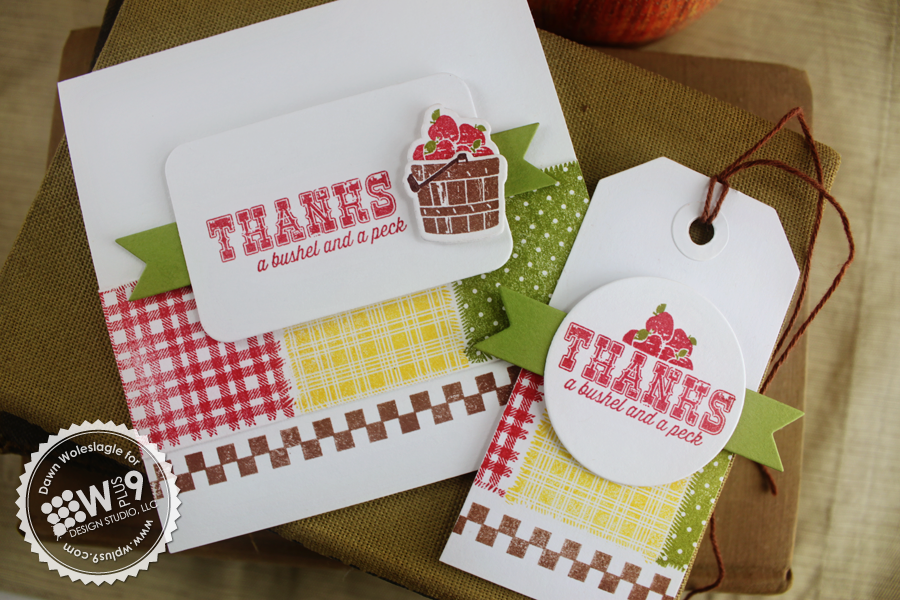
I adhered the focal image onto a rectangle that I stamped the checkered pattern from Country Charm onto at the top and bottom. The sentiment was added from Pretty Patches: Apple which I will show you more of tomorrow.

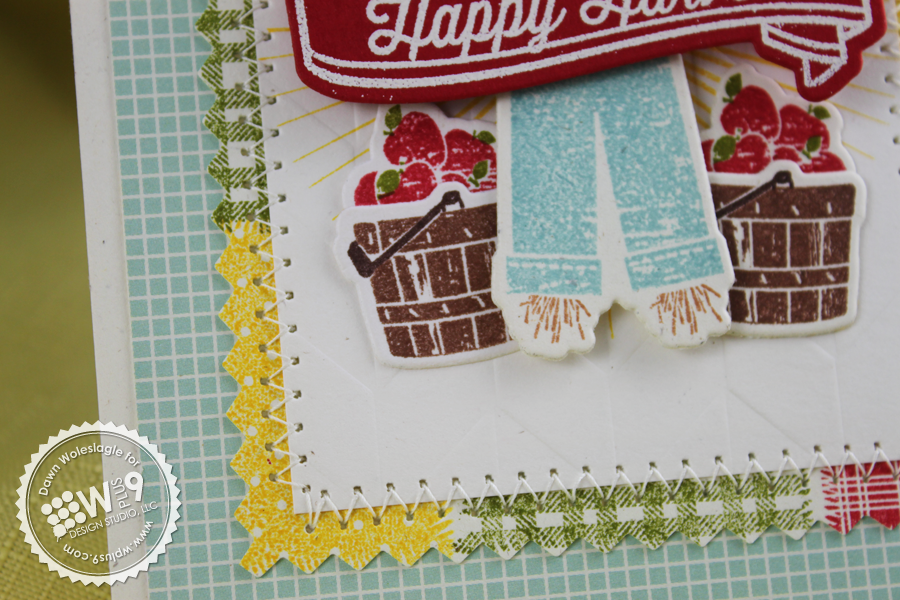
Some gorgeous patterned paper from the Clippings collection by Basic Grey was the perfect base for this card. I'm really loving this color palette for the fall. The blues are such a great addition to cool off those warm tones.

My favorite of the day is a spectacular display of how well Country Charm and Clear Cut Stackers: Pinking Squares compliment each other.

I started by die cutting several of the pinking squares and stamping them with the patterned patches from Country Charm. I added the 1" die cut pinking squares stamped with hearts from Pretty Patches: Apple, & Pretty Patches: Pumpkin to the center of the left and right squares.

For the center, I decided to add a bit more dimension. I cut one square, and then die cut a negative space out of the middle using the square one size smaller. This created a perfect frame for the butterfly from the Layered Butterfly Die.

Another sentiment from Pretty Patches: Apple on a Label Layers 3 die cut topped with a heart border I created with the Silhoutte and a little lace border from Mehndi Medallions at the top finish this card off.

I really wanted to create a background pattern using Quilt Cuts 1 and was really happy with how quick it went. And I can not get enough of that Basic Grey paper!

To create the repeating pattern, I started in the middle of my card and worked my way out on either side. This made sure that my pattern was centered. To really make laying down your pattern go quickly, you could cover your area with adhesive and then just place your tiles as you go. I filled in at the sides and in between each square with the regular hexagon shapes also included in the Quilt Cuts 1 Die. And added a few to the left side to bring some of the pattern to the left side for balance.

The focal image needed to be pretty heavy visually to hold it's own against that background, so I chose to use buttons matted with a few layers of pinking squares.

A simple tag from Timeless Tags stamped with a heart from Pretty Patches: Pumpkin and pinned to a seam binding bow was the perfect finishing touch.

Let's switch it up a bit and go graphic, bold and bright.

How's that for a punch of color? Here, I used the solid stripe from Country Charm to create a plaid background. I simply stamped a series of stripes on the diagonal in gray, and then again in pink in the opposite direction.

For my focal image I revisited Love You More. A perfect go-to for graphic styles.

That concludes Day 2 for me. But the Design Team has some show stoppers to share as well!

I really hope you are enjoying the release so far! What do you think, are you digging the whole quilt sensation? Would you like to win Country Charm, the Clear Cut Stackers: Pinking Squaresand the Quilt Cuts 1 Die? Just leave me a comment by 9:00 AM EST August 7th to enter. I will select one random winner from all comments. Winners will be posted here.

Sunday, August 5, 2012

August/September 2012 Release Day 1

We're a little late, but it's finally Release Week! For those of you that are new to Wplus9, we will spend the next couple of days getting up close and personal with the products that we will be releasing this month. All previewed items will be available for purchase on August 9th at www.wplus9.com.

This month we will be introducing 4 new stamp sets and 5 new dies! And, guess who we have Guest Designing with us? Mama Mo herself, otherwise known as Maureen Merritt! I just love all of her creations and I am so excited to see what she turns out!

Fall is fast approaching. Soon the leaves will be turning, the kids will be heading back to school and it will be time to start harvesting and giving thanks. This release is filled with products to help with just that. Each product in this release is designed to coordinate and work seamlessly with each other. First up is an all around FUN set and companion die.

Happy Harvest

  • is a 6x8 clear photopolymer stamp set
  • 31 high quality photo-polymer stamps; 18 scene building images and 13 sentiment builders
  • will be available for purchase August 9th for $21
Happy Harvest Companion Dies

  • coordinates with the Happy Harvest stamp set
  • seven separate dies wired together that can be easily snipped and separated
  • will be available for purchase August 9th for $14

I had so much fun illustrating every thing in this set. But the star of the show is definitely this little guy.

The Happy Harvest Companion Dies make building this little guy so much fun! There are so many little "extras" included in this set to really open the possibilities. You'll notice that the hat, bandana and straw hands and feet are all separate stamps. The bucket and handle are also separate so that you can add a little extra dimension even when you aren't using the die cuts.

There are also tons of sentiments included in this set. Here, I've used the pre-built "Gratitude" sentiment. You'll notice that these images are all intentionally distressed, adding to that rustic feel of the over all set. I matted this guy on a new die cut (that we will introduce tomorrow) that I stamped with the sunburst image from Super Star.

The back panel was embossed with our Chevron Impression Plate after I stamped the sentiment and a border from another set we will be introducing tomorrow.

There are quite a few little things to fill that bucket, and the wheel barrow included in Happy Harvest.

Like these sunflowers! These are a fun little bunch of 3 step stamping sunflowers. Here, I've die cut the wheel barrow and sunflowers and then stamped them with the coordinating images.

I think that the simplicity and color scheme make this doable as a masculine card...even with the sunflowers. No?

Next up, is my favorite of the day.

I used the same basic layout as my first card, with just a few modifications. I die cut a banner from the Le Cirque Die and stamped it with the matching stamp from Le Cirque. I added the "Happy Harvest" sentiment from Happy Harvest all embossed in white. I LOVE how he is holding the banner!

This time I filled the little bushel baskets with the apples included in Happy Harvest. The background was created using Country Charm, which I'll show you more of tomorrow. I just loved the way this one came together.

My final card today, showcases how you can use this set beyond fall or Thanksgiving.

I think this would make a darling card and tag for a teacher gift. I used more of the backgrounds in Country Charm and the apples and sentiments from Happy Harvest. A little help from the Banner Trio die, the Circle Stackers 1 die, and the Label Layers 4 die brings these all together for a matching little ensemble.

That's all I have for today. But the Design Team has plenty to show you! And they are awesome! I always love what these ladies come up with.

Are you feeling a little Fall-ish? Would you like to win Happy Harvest and the Happy Harvest Die? Just leave me a comment by 9:00 AM EST August 6th to enter. I will select one random winner from all comments. Winners will be posted here.

Connect with us:

Follow Us on Pinterest