Showing posts with label Large Butterfly Frame Die. Show all posts

Saturday, May 27, 2017

Wedding Wishes With Kara

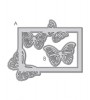
Hey Guys! Kara here with yet another project featuring the Large Butterfly Frame Die. It's such a versatile die and I haven't tired of exploring all of the many ways it can be used. This time I've stamped and colored on the die cut as well as added a drop shadow.

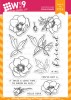
It's no secret that I love a lot of white space, but there has to be an element that pops and makes it interesting. On this card it's the colored images. I die cut the butterfly frame first from white cardstock. I then stamped the Modern Anemones strategically on the die cut. I colored the flowers and leaves with Copic markers {R24, R29, R59, YG61, YG63, YG67} and coated them with clear Wink Of Stella. A little bit of shimmer is in order for a wedding card!

I wanted to add a drop shadow to the butterflies, but not to the outer frame. I die cut the butterfly frame from black cardstock and then carefully snipped the frame off. What I was left with was just the five connected butterflies. I was able to off set them slightly behind the white frame and adhere it with some tiny glue dots.

I stamped the Wedding Wishes sentiment, from Modern Peonies, in the center. I adhered the frame to a white card base using dimensional adhesive.

A simple yet striking wedding design. I hope my friends will love it. They are getting married in September.

Thank you so much for stopping by!

Featured Supplies

For your convenience, here is a list of the featured Wplus9 supplies or equivalents used on today's project(s), along with links to purchase.
Saturday, May 13, 2017

Die Cut Masking And Spray Mists With Kara

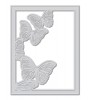
Good Morning, Guys!  It's Kara and I'm back with more May release inspiration.  I'm using the Large Butterfly Frame Die again.  This time I've used it to create a mask!
 
 
I started by die cutting the Large Butterfly Frame out of masking paper.  I peeled off the backing and popped out all the wing pieces.  I placed the die cut onto white cardstock and burnished it with a bone folder to make sure all edges were firmly adhered.
 
 
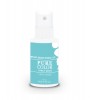
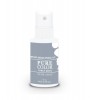
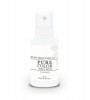
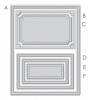
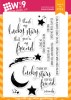
Once the mask was firmly in place I sprayed the cardstock with Lake House, Silver Lining, and Shimmer PURE Color Spray Mist.  I left the piece to dry before removing the mask.  Once it was dry I removed the mask and then die cut the piece with the large stitched rectangle from the Gift Card Layers Die.  With some black dye ink I stamped this large sentiment from the Lucky Stars stamp set.  I die cut some black cardstock with the butterfly from the Small Butterfly Frame Die and coated it with clear Wink Of Stella.
 
 
I die cut a panel of black cardstock using the same large rectangle die to layer behind the main panel.  I love the way it turned out and all of that shimmer!
 
 
A super easy and fun technique that is perfect for this new die! I hope you enjoyed it. Thanks for stopping by today.  See you next time!
 

Featured Supplies

For your convenience, here is a list of the featured supplies used on today's project(s), along with links to purchase. Please note: this list may contain some affiliate links.
Thursday, May 4, 2017

May 2017 Release Week: Large Butterfly Frame Die with Kara

Tomorrow is the day! All of the new products that we have been sharing with you over the last couple of days will be available for purchase at wplus9.com as well as at many of your favorite retailers. If you are just joining us, be sure to start at Day 1 to catch up.

Today, I get to introduce the new Wplus9 Exclusive Large Butterfly Frame Die. This die will be available exclusively at wplus9.com.

AVAILABLE May 5, 2017

Large Butterfly Frame Die
Steel Rule Die
$19 USD

There are so many great stamps and dies being released. I love them all, but my favorites are always the floral sets. They are beautifully designed and timeless. And the new Large Butterfly Frame Die compliments these gorgeous florals perfectly!

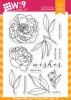
I couldn't resist sharing both Modern Peonies and Modern Anemones as well today. Both are colored with Copics in these vibrant greens and oranges (R08, YR07, YR04, YG17, YG67). I chose to go with simple, yet bold coloring and think the strong illustrations are perfect for this clean look.

My first project features the Modern Peonies positioned on the new Large Butterfly Frame Die. This die is beautiful! It's large enough to cover the entire front of an A2 sized card and has so many possibilities. You could even die cut it and use it as a stencil.

I adhered it to my card base with dimensional adhesive. To top it off, I added the single butterfly from the Small Butterfly Frame Die. The butterflies are identical on both dies, just in varied sizes. When Dawn first released the Small Butterfly Frame Die, the name made me hope that one day she would release a large version. It's finally here and worth the wait!

For my second card, I used the Modern Anemones set. This time I used the previously released Lattice Frame Die as the backdrop for my flowers. It adds beautiful texture and the perfect spot for a sentiment. The sentiments stamped on these cards are from the opposite sets. The 'Sending Birthday Wishes' is from the Modern Peonies set and the "It takes a long time to grow and old friend' sentiment is from the Modern Anemones set. I did that just in the interest of space and placement in the design.

Because all of the "Modern" florals series share the same font and sizing, and all of the flowers are scaled appropriately, everything can be combined, swapped and interchanged with each other to further expand the possibilities.

Thanks so much for stopping by! I hope you are enjoying all of the new product previews. Dawn will be here tomorrow, so be sure to stop in again!

Giveaway Alert

Would you like to win a $50 store credit to wplus9.com? Just leave a comment below by 10:00 p.m. EST on 05/04/17 to enter and we will select one random winner from all comments. Winner will be posted on our Winners page by 11:00 p.m. on 05/04/17.

Connect with us:

Follow Us on Pinterest