Showing posts with label Flower Doodles Die. Show all posts

Monday, July 24, 2017

Easy Window Card with Kara

Hey Guys! It's Kara and I'm here with another project to share featuring the new Southern Summer Florals 1. I've been spending a lot of time outdoors and my hydrangea bush is full of beautiful blue blooms. I decided to bring in those blue shades with this new floral set. Lake House and Nautical Navy are my favorite combination!

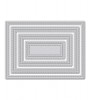
I started by die cutting a piece of white cardstock with the 4 Bar Stitched Rectangle Die. In the center of that I positioned the large oval from the Basic Labels Die to create a window. I created three clusters of flowers and leaves around the oval window placing some in front and some behind the opening. The clusters include the blue flowers I stamped earlier as well a few accent flowers stamped in Hayride ink and leaves stamped in Mojito and Appletini.

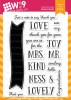
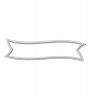
I die cut a banner using the Bold Banner Die to span the width of the oval window. Since the left side of the banner would be tucked into the floral cluster, I stamped my sentiment closer to the right end of the banner. I had blue hydrangea in my wedding bouquet so obviously this has got me thinking about love! I chose the Mr.&Mrs. stamps from the Bold Banner Greetings set as my main sentiment.

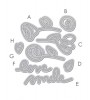
I placed the die cut embellished window on top of another panel of white cardstock that had been die cut with a stitched rectangle die. Then both of those layers were adhered to a white card base. Between each layer I used dimensional adhesive. When using so much white I like to add texture and dimension for interest. As a final touch I added the die cut 'love' from Flower Doodles Die!. I love the shadows this creates.

Thanks so much for stopping by today!

Featured Supplies

For your convenience, here is a list of the featured Wplus9 supplies used on today's project(s), along with links to purchase.

Tuesday, March 14, 2017

Quick Clips with Natalia Valkovskaya

Hello everyone! This is Natalia and I’m so happy to be back here today to share two quick (3 minute) videos with you!

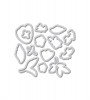
Wedding season is just around the corner, and although most of my friends are already happily married you never know, right? Better be prepared. So I’m stepping out of my comfort zone as far as the colour palette goes and making a wedding card using the Flower Doodles Die. This is a really great set with adorable doodly flowers and two sentiments. You can use it in so many ways! Love it


Watch above or watch in HD at YouTube

There are stand alone leaves and rose bud dies in the set. I die cut a bunch of those from the Inkadinkado masking paper and arranged them on the panel which is just a piece of regular A2 white cardstock. I then used a Clarity Brush to add Shell Pink Ink. I like the soft look the brush helps me to achieve, and t is exactly what I need for this project. After removing the masks (always my favourite part by the way), I trimmed the panel down to 5 x 3.75 inches.

For the sentiment, I’ve used Bold Banner Greetings stamps and companion die. I die cut the banner and the card base from Dove Grey cardstock, which is a very beautiful subtle grey - just perfect for my card today. I stamp the sentiment in Fairy Dust Ink.

I die-cut one of the flowers from the set, and used my mini daubers to colour it with the same inks I used previously. Finally, I foam mounted the panel and the banner and adhered the flower with a glue pen. For extra support of the delicate die cut, I cut tiny pieces of foam tape for the parts of the flower that hang off the banner. A sprinkle of sequins to add a little sparkle and it’s done!

Before I go, here’s a bonus for you!

Have you ever been in a situation when you need a card or a gift tag, like right now? I know I have. So here’s a super quick mini card/tag idea using the same Flower Doodles Die.


Watch above or watch in HD at YouTube

All you need is an A2 piece of cardstock, distress ink pad of your choice, a die-cut flower from the set, and your favourite sentiment. Four simple steps and you are ready to go:

  1. Fold the piece of cardstock in half
  2. Press the ink pad against the folded cardstock
  3. Adhere the die-cut
  4. Add the sentiment

Done!

I hope I could give you some inspiration! Thanks again for your time!

As always, be safe, and happy crafting!

~Natalia

Friday, August 21, 2015

Pure Color With Kara: #3 Stamping Text Over Stamped Images


Hello! I hope your are enjoying the last bit of summer. I am soaking up every minute.  This is Kara and I'm here today to share another PURE Color Combination inspired by a beautiful scarf that belonged to my mother-in-law.  Take a peek at my Instagram feed for a look at the inspiration piece.  The feather pattern on the scarf includes colors very similar to Fairy Dust, Silver Lining, Wild Mango, Pumpkin Spice, Bo Peep, and Nautical Navy.

My projects today both have backgrounds created by stamping text over stamped images.  I love the effect on both the masculine and feminine version.  This first card is a great encouragement card that would be perfect for a guy in your life.  The colors help create  a masculine feel, but as you will see below, they are gorgeous and unexpected colors for floral images as well.  I started by stamping one image from the Backgrounds and Borders 4 set repeatedly to create a pattern.  I would stamp several in one color and then switch to another color.  Make sure to clean the stamp well {and stamp off on scrap paper} in between colors.  If you stamp in order from light to dark, the amount of cleaning is minimized.  Once my background was complete, I stamped the text over top in black.


WPlus9 Supplies
Stamps: Backgrounds and Borders 4, Encouraging Words // Dies: Love Mom Layers, Banner Trio //Ink: Fairy Dust, Silver Lining, Bo Peep, Nautical Navy, Wild Mango, Pumpkin Spice, Black // Cardstock: White, Coal Mine
 

Using the Love Mom Layers large circle die, I cut away a circle from the front panel to reveal a coordinating sentiment stamped directly onto the card base.  I finished it off with a banner, from Banner Trio die, cut from Coal Mine cardstock and white heat embossed with a third sentiment from the Encouraging Words stamp set.

This second card mixes Watercolored Anemones with the new Grateful Greetings stamp set.  This stamp in particular has such a beautiful, feminine font that just works perfectly with any WP9 floral images you may have.  I stamped the panel the same way, images first then text.  I wanted to highlight the sentiment and also tone down the bold pattern.  To do this I used a piece of vellum with a die cut circle window to draw your attention to the center sentiment.  I used the same circle die that I used on the previous project.


WPlus9 Supplies
Stamps: Watercolored Anemones, Grateful Greetings, Hand Lettered Thanks // Dies: Love Mom Layers, Banner Trio //  Ink: Fairy Dust, Silver Lining, Bo Peep, Nautical Navy, Wild Mango, Pumpkin Spice, Black  //  Cardstock: White, Coal Mine 
 

Again, to add a secondary sentiment, I used the Banner Trio die to stamp and heat emboss a sentiment from Hand Lettered Thanks that really compliments the Grateful Greetings.


Play Along

Now it's your turn!
Use this color prompt along with at least one Wplus9 product (more is always welcome!) and upload your project to your blog or online photo gallery such as Flickr. Then link it up using the InLinkz widget below by September 4th 11:59 p.m. EST, to participate and keep the inspiration flowing!

If you'd like us to repost and share your creations on Instagram, be sure to use the hashtag #wplus9PureColor!

Prize

We will select one random participant to receive a $20 store credit to wplus9.com. The winner will be posted here on the blog.

Pure Color #3 Entries


Thanks you so much for stopping by today! Come visit me on my blog for a look at the third project you see in the group photos using this PURE Color Combination.

Monday, June 1, 2015

June 2015 Release Week Day 1

Welcome to our June 2015 Release week! It's time to officially unveil all of the new products hitting the stores on June 5, 2015. But before they officially go on sale we are going to spend the next couple of days previewing all of the new stamps and dies and showing you some fun ways to use them. You can find all of the new products at the bottom of this post.

Remember, the entire June 2015 Release will be available for purchase beginning June 5th at wplus9.com as well as at many of your favorite retailers.

Welcome Kelly Latevola

I am also very excited to be welcoming a new addition to the Wplus9 Design Team - the very talented Kelly Latevola!

I have had the pleasure of meeting Kelly in person, and I must say, she is just as amazing as her work. I am very lucky to not only call her a Design Team member, but a true friend. A master with color - especially with Copics - I am positive that she will be an invaluable addition to the Wplus9 family.

If you are not already familiar with her work, I highly recommend checking out her blog - You and Your Big Dreams - and welcoming her to the team! And this release is perfect timing as I think she is really going to shine!

Speaking of this release, it is filled to the brim with fun, versatile products. I know that for me, dies have become a staple in my crafting arsenal. Like many of you, I just can't get enough of them! And today, I wanted to share a few projects featuring the new Flower Doodles Die.

For this card, the "love" die cut included in the set, pretty much does all of the work. I die cut it 5 times from our White card stock and once from rose gold foil paper. I adhered the foil one to one of the white ones for a little extra stability and added all 4 to a panel that I watercolored using Gansai Tambi watercolors.

To complete the sentiment I used the "you" from our Hand Lettered Thanks stamp set heat embossed on our Coal Mine card stock.

The watercolor panel is adhered to our Cashmere card stock with a little foam tape and the card is finished off with a few Pretty Pink Posh sequins. If you want a laugh, be sure to check out the sequin conversation on our Instagram feed on this card. Oh the struggle. LOL

I am really loving the large word dies, and the size on these is perfect. Not too big and not too small. They are delicate in weight, but not too delicate. And yep, all of the dies in this set are my doodles and my handwriting.

This next card is a great example of how to use the negative space from the word dies in this set.

This one was extremely easy to execute as well. I stamped the white panel with the paint stroke from the Main Squeeze stamp set using our Flamingo, Wild Mango, Mojito Pure Color dye inks and Audrey Blue from Simon Says Stamp.

I layered the negative die cut over a hand torn piece of vellum, added a little black thread, some enamel dots and sequins, and adhered it all to a Coal Mine card base.

I really love the deckled edges on the vellum. I'll be doing this more often, intentionally...yeah, not because I'm lazy. ;o)

The Flower Doodles Die also contains three large doodled flowers. They are a great size to be used as a focal point like I've done in my next two cards.

I decided to focus all of the attention on the flower die cut in this card by leaving the rest of the card black, white and gray. I inked the die cut using Wild Mango and Beanstalk dye ink and layered that onto two tags die cut using the Timeless Tags 2 Die. The sentiment from Doodle Buds was heat embossed onto some Coal Mine card stock.

The background was created by applying a little embossing paste through a Tim Holtz honeycomb stencil and then splattering a little black ink across it with a paint brush.

And finally, we have a very simple, but one of my favorite cards.

I used all three flower dies and the Faux Letterpress technique. I followed Jennifer McGuires tutorial - minus the inking - for this technique. After I letterpressed the watercolor panel, I added some very loose watercoloring over the top of each flower using Gansai Tambi watercolors.

I finished it off with a stamped sentiment from Hand Lettered Hello and the "smile" die cut from the Flower Doodles Die cut from Dove Grey card stock. I trimmed the panel down a bit and adhered it to a Dove Grey card stock card base.

As promised, here is a look at the entire release.

June 2015 Release - available 05/05/15

Photopolymer Clear Stamps

Dreams Into Plans
3x4" Clear Stamp Set
$6 USD

Doodle Buds
4x6" Clear Stamp Set
$14 USD

Happy Mail
4x6" Clear Stamp Set
$14 USD

Party Animal
4x6" Clear Stamp Set
$14 USD

Watercolored Anemones
4x6" Clear Stamp Set
$14 USD

Greetings & Salutations
4x6" Clear Stamp Set
$14 USD

Main Squeeze
4x6" Clear Stamp Set
$14 USD

Steel Rule Dies

Doodle Buds Companion Die

$16 USD

Happy Mail Companion Die

$15 USD

Party Animal Companion Die
$17 USD

Watercolored Anemones Companion Die

$8 USD

Greetings & Salutations Companion Die
$5 USD

Flower Doodles Die
$16 USD

PURE COLOR Dye Ink - available EXCLUSIVELY at wplus9.com

Black
Dye Ink
$6 USD

Design Team Inspiration

Be sure to stop by and see what the design has been up to as well:

Giveaway Alert

Would you like to win a $25 store credit to wplus9.com? Just leave a comment below by 10:00 a.m. EST on 06/02/15 to enter letting me know what you are most excited about from this release and I will select one random winner from all comments. Winner will be posted on our Release Winners page by noon on 06/02/15.

And, you will definitely want to stop by tomorrow. Joni will be here debuting her newest stamp set - Happy Mail!

Thanks for stopping by!

Connect with us:

Follow Us on Pinterest