Showing posts with label Sunshine Layers. Show all posts

Thursday, April 14, 2016

Color Burst Rose Background with Maureen

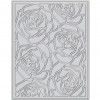
It's Maureen here today with a card featuring the newly released Rose Background die. This die is so delicate and beautiful. It's perfect for Spring and the upcoming wedding season. I decided to pair it with a bold technique to make the design really pop.

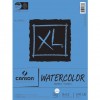
I began with a 4 1/4 x 5 1/2" piece of watercolor card stock, spritzed it generously with water, and then sprinkled the background with Color Burst.

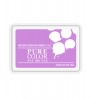
Color Burst is a highly concentrated watercolor pigment in powder form that makes creating watercolor backgrounds easy. You can add as much or as little of the powder as you'd like, depending on what you want your outcome to be. Because this powder is so concentrated a little really does go a long way! You can heat set this piece to speed up drying, or let it air dry.

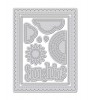
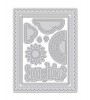
The Rose Background was die cut from White Cardstock and then adhered to the watercolored background with liquid glue. Rather than placing this whole piece to the card base, I die cut a portion of it using the Sunshine Layers Die and layered it onto vellum before adding it to the white card base.

This really made the design pop! To keep the background the focal point, I added a simple heat embossed sentiment.

I can't wait to see how you use this beautiful die! Thanks for stopping by today, and you will definitely want to come back tomorrow. We have another very special Guest Artist that you will not want to miss!

Featured Supplies

For your convenience, here is a list of all of the supplies (or equivalents) used on today's project(s), along with links to purchase. Please note: this list does contain some affiliate links.
Saturday, April 9, 2016

Watercolored Dahlias With Kara

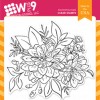
Good Morning! It's Kara, back again to share a project featuring a favorite of mine from this month's release. I know by how fast this set sold out of the WPlus9 Shop that it's one of your favorites too: Beautiful Bouquets: Dahlia!

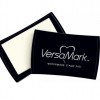
I started by stamping this image in Versamark ink onto watercolor paper. I then heat embossed it with white embossing powder. I started to add color by first wetting a small area and then dropping the distress ink into the desired area. I layered in 3 colors of green for the leaves to add variation, as well as a few shades of reds and oranges for the flowers. Once that was dry, I went in and added a bit of water on the background and painted on the blue distress ink. I had a lot of fun with this. Most of time I'm too impatient, but I really tried to allow areas to dry and then go back in with some more color. I love how it turned out!

When all of my watercoloring was dry I die cut the panel with the Sunshine Layers Die. I prefer to die cut after I paint because the pressure from the die cutting machine helps to flatten any warping from the water. I love to use black on my cards as a bold accent. Here I've used black cardstock to die cut the new Happy Wishes Words Die. I've also added a secondary sentiment from the Dahlia set to finish it off.

I can't wait to start seeing you use this set! Thanks so much for stopping by.

Featured Supplies

For your convenience, here is a list of all of the supplies (or equivalents) used on today's project, along with links to purchase. Please note: this list does contain some affiliate links.

Saturday, April 2, 2016

VIDEO: Intro to Freehand Florals

Hello and welcome back to our April 2016 Release Week. We have lots to share with you, and per usual, a little something for everyone! And if florals are your thing, then today is for you.

I'm excited to formally introduce the Freehand Florals Stamp Set and Companion Die.

AVAILABLE APRIL 5, 2016

Freehand Florals
4x6" Clear Stamp Set
$15 USD

Freehand Florals Companion Die
Steel Rule Die
$11 USD

Freehand Florals is inspired by my floral Copic illustrations. Many of you requested that I create a stamp set based on these illustrations. And I am so happy with how it turned out. The loose hand drawn style of this multi-step/layering set makes it really forgiving to line up the layers when using the stamp set alone since they don't have to be perfectly aligned.

However, when using the stamp set with the companion dies, it is important to line the layers up correctly when stamping. This can be a bit tricky...if you don't know the trick. Want to know the trick? In today's video I give you an in-depth look at this set, share tips on stamping and how to perfectly line up the die cuts and create today's card from start to finish.

Watch above or watch in HD at YouTube

The range in sizes of the flowers and leaves in this set make it really versatile. You can create all over backgrounds, large focal images or create smaller accents. Plus the universal design of these images can pull off both a modern or shabby chic look.

I have more cards to share with you over the coming weeks featuring Freehand Florals including more videos, so I hope you will be sure to stop by frequently. And there is still plenty more of this release coming this week. But in the meantime, here is a bit more inspiration for today.

More Inspiration

Giveaway Alert

Would you like to win a $25 store credit to wplus9.com? Just leave a comment below by 9:00 a.m. EST on 04/03/16 to enter and we will select one random winner from all comments. Winner will be posted on our Winners page by noon on 04/03/16.

Featured Supplies

Connect with us:

Follow Us on Pinterest