Friday, November 18, 2016

GUEST ARTIST FEATURE: Carissa Wiley

Hi everyone! Thanks for stopping by today. Carissa Wiley here, and I am so excited to be a guest designer here on the WPlus9 blog today. I’m going to be sharing a few projects with you that combine several of my favorite WPlus9 products. It’s all about layering and combining to create beautiful cards for the holidays (or year round).

Watch above or watch in HD at YouTube

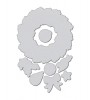
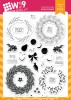
The focal area of my holiday cards combine the Woodland Wreaths stamp set, BeMerry stamp set and the Label Layers 2 die. I’ve used a lot of these same elements in my floral card as well....just to show you that once you have a layout that works, you can change up the elements to create a card with a completely different theme.In fact, a lot of my cards have the same basic layout. Changing the stamps, colors and elements gives them a completely different feel.

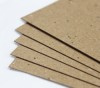
I chose to use the Natural Wafer Board to die cut my Label Layers 2 die. This gives the die cut more weight and presence on the front of the card. It serves as a nicegrounding place for my grouping of elements. I added just a touch of gold around the edges with some Rich Pale Gold embossing powder.

These cards have lots of dimension. You wouldn’t have to add this much dimension when creating this card...but I always think it’s fun to have elements that just pop off the page.

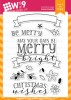
In order to adhere the vellum sentiment from the Be Merry Stamp set, I used some Kool Tak Clear Foam adhesive. This isn’t completely invisible, but since there is quite a bit of embossing, I was able to hide it pretty well.

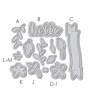
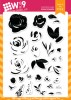
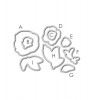
I wanted to take this same basic principle and make it in to a year round card. I substituted my wreath for a grouping of stamped images from the Freehand Florals stamp set. I added a touch of gold to the flowers by stamping one of the layers in VersaMark ink and adding more of that Rich Pale Gold embossing powder. I also used the hello sentiment from the Bountiful Blooms die set. I layered it right on top of the banner from the Be Merry stamp and die set. Then I topped off the sentiment with a layer of Glossy Accents to give it shine and dimension.

Thanks for stopping by today. I want to thank Dawn for inviting me to share with you today. I hope you’ve enjoyed these projects and I hope you have a fabulous day!

Featured Supplies

For your convenience, here is a list of the Wplus9 supplies (or equivalents) used on today's project(s), along with links to purchase.
Thursday, November 17, 2016

GUEST ARTIST FEATURE: Andrea Radulescu

Hello everyone!

I am Andreea Radulescu and I am truly honored to be guest designing for WPlus9 today. I was so excited with the latest release and for today’s card I used two of the Christmas stamp sets along with their companion dies. A full supply list along with links can be find at the end of this post.

Watch above or watch in HD at YouTube

I started by stamping the cute images from the Santa’s Reindeer stamp set onto a piece of watercolor cardstock and used my watercolor markers to color everything in. Once all was colored I used the matching dies to trim everything out. I find that this set is just so cute and having the matching dies made the creative process so quick and easy.

For my background I used a black and a dark blue Distress Ink that blended so beautifully onto my watercolor cardstock.

To create the sentiment for this card, I used the Be Merry stamp set and white heat embossed the gorgeous banner from the set. This is another great stamp to have as it can be used in so many ways and I will for sure use it to mass produce my cards for this year’s Christmas. Being such a large stamp it takes so little to fill in a card and you can have your cards made within minutes.

As I love adding details to my cards, I used some glittery glue to cover the white areas on my colored elements, brushed a bit of clear Wink of Stella on top for extra shimmer and glued several clear sequins here and there. To add more interest, I adhered the sentiment banner with a double layer of dimensional foam and tucked behind the reindeers and the cute little Santa using one layer of foam only.

For my night sky I used some white paint that I splattered it on with a small brush. In the end, I adhered my panel onto a white card base and my card was all done!

I hope you enjoyed my project and I thank you all for having me on the WPlus9 blog today!

Featured Supplies

For your convenience, here is a list of the supplies (or equivalents) used on today's project(s), along with links to purchase. Please note: this list does contain some affiliate links.
Wednesday, November 16, 2016

Random Pattern Stamping with Kara

I love the look of this all over stamping. I'm seeing this a lot lately and I love it! It's such a great way to use all of the images in a set on one card without having to build a scene.

I start with my largest images first. I tend to stamp them in threes, creating a triangle. I did that with the Santa image and then the reindeer image. After that, I filled in with the smaller images like the bag and hat. I usually stamp those in odd numbers too, like five or seven.

Once the secondary images are all stamped I go in with a tiny accent stamp like the snowflakes I've used here or the music notes that are also in the Santa's Reindeer set.

All that's left to do now is color! I chose Copics, but any medium you prefer would work.

Finally, I added my die cut sentiment from the Christmas Tag Die. I die cut the words and letters from black cardstock and added a layer Wink Of Stella in clear over top. I love that shimmer. Thanks for stopping by today!


Featured Supplies

For your convenience, here is a list of the supplies (or equivalents) used on today's project(s), along with links to purchase. Please note: this list does contain some affiliate links.
Connect with us:

Follow Us on Pinterest