Wednesday, November 23, 2016

VIDEO: Black, White and Gold Be Merry Florals

Hello! I feel like it's been awhile since I've shared anything with you guys. Oh, I've been creating and filming...but something always seems to come up before I have time to do editing and voice overs. So we are fixing that starting today, with these beauties!

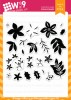
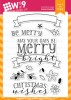
There is something about a simple color combination of black, white & gold that is so elegant. I knew I wanted to incorporate this classic combo with our new Be Merry Florals stamp set and this is what I came up with. You can watch below to see how easy these are to recreate. They utilize a lot of heat embossing, but few supplies beyond that.

Watch above or watch in HD at YouTube

I started by stamping my background leaves in Black onto Coal Mine card stock, and then heat embossed my sentiment in white. I then added all of my white floral heat embossing, followed by the gold heat embossing.

I matted each version with a metallic card stock. But, you could definitely forego the mat for an even more clean and simple version.

I think this layout and technique would look beautiful with colored embossing powder as well. How about you? If you try it out, I'd love to see. Be sure to post on social media and tag #wplus9 to share yours!

Thank you so much for stopping by today! And for those of us celebrating, I hope you have a wonderful and safe Thanksgiving!

Featured Supplies

For your convenience, here is a list of the supplies (or equivalents) used on today's project(s), along with links to purchase. Please note: this list does contain some affiliate links.
Monday, November 21, 2016

Quick and Easy Holiday Cards with Natasha Valkovskaya

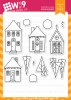
Hello everyone! This is Natalia Valkovskaya and I’m happy to be back to share with you two ideas featuring the adorable Holiday Houses stamp set. I love this set! It is so much fun to play with, and the opportunities are truly endless! No matter how much (or little) time you have on hands, you can make beautiful projects! So let’s jump right in!

Let’s say you have an idle evening and you are in for some coloring (maybe you are taking part in Kathy Racoosin’s 30 Day Coloring Challenge), then my first card is for you.

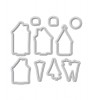
I stamped a bunch of watercolor sheets with the Holiday Houses stamp set in watercolor friendly ink. Using the MISTI made it really quick and easy. I then went to town coloring them! Any coloring medium of your choice would work, I went for watercolor this time. Then I die-cut all of the colored images with the companion dies.

For the background, I masked a piece of Ranger watercolor paper with some post-it tape and colored the inner rectangle with Ranger Tim Holtz Distress Inks in Tumbled Glass, Salty Ocean and Blueprint Sketch, using a Blender Tool. Then I spritzed the blended area with some water and removed the droplets with a paper towel to create this lovely snowy effect. I also jazzed up the panel with a stitched border using the Gift Card Layers Die.

I made sure to stamp the sentiment before I started adhering the houses. Again, the MISTI came in handy to ensure dark and crisp stamping. I had so much fun playing with these cute little houses arranging them in different ways! Then I adhered the first row of houses and trees, and foam mounted some elements of the front row for extra dimension. I also adhered some trees a bit off the frame on the sides – I think this made the scene look more lively. Finally, I added some snowflakes with a white gel pen.

I also decorated the inside stamping the images in white ink.

What if you are pressed for time and you need to mass produce some holiday cards (we’ve all been there, right?), then hopefully you’ll get inspired by my second card.

For this one, I again stamped several watercolor sheets in Versamark ink and heat embossed them in white. Then I did the messiest and sloppiest watercolor ever – it literally took me a minute to color three panels! Talk about efficient! Then I die-cut them with coordinating dies.

To ground my trees and houses I stamped the base panel with Background Builders: Knit. Perfect for winter projects! I used Fairy Dust ink for a subtle look. I stamped the sentiment and snowflakes in the same ink.

And voila! Three holiday cards in no time at all!

That’s all from me for today. Thank you for staying with me till the end. Be safe, and happy crafting!

Featured Supplies

For your convenience, here is a list of the supplies (or equivalents) used on today's project(s), along with links to purchase. Please note: this list does contain some affiliate links.
Connect with us:

Follow Us on Pinterest