
Hi there everyone! I hope you are having an amazing day. It's Lydia here with you from Lydia Evans Design, and I'm so excited to be guesting here again on the WP9 blog.
Today I'll be sharing some cards that stretch some of your holiday stamp sets. If you know me you know I'm a floral gal so I'll be using a floral holiday set and by just changing up the colours you can make it work all the year through.

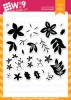
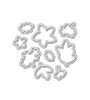
I started by die cutting the Be Merry Florals Coordinating Die Set twice, I haven't snipped these apart as I find it quicker just to cut a full set out, (discard the ones I don't want to use) and then stamp with Be Merry Florals stamp set onto the cut-outs.
I used a mix of springy colours, the purples, pinks, yellows and greens give such a fresh feel and the images don't look 'holiday-ish' at all now. I used the rock-and-roll technique to ink up the images, to do this ink the image in a light shade and then roll the outside edge in a darker shade before stamping. I love the variation of colour this gives and it's so quick and simple too!

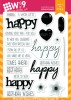
The sentiment is a mix of a die cut and stamped words. I used one of the word dies from Happy Trio and cut this twice, once from black card and then from some black foam before attaching them together with the card one on top. Using foam in this way gives dimension to the die cut with out having to cut it out multiple times.
To get the placement right for the rest of the sentiment and floral clusters I used re-positional adhesive on the back of the happy die-cut and put this in place before adding all of the other elements. I could then lift it up when I wanted to place things behind. When finished, I removed it and then adhered it down with strong adhesive.

A little bit of black splatter and a couple of clear sequins finished the card.
For a full step-by-step on how I created this card please watch the video below.
Watch above or watch in HD at YouTube
I also made another card using the same supplies but mixed up the ink colours, changing the colours you can give more of a summer feel.

I did add a bit more black splatter to this, left out the sequins but for some shine I added some Glossy Accents to the top of the happy die-cut.
I have to say I love how these cards turned out and I hope I gave you some ideas on how to stretch some of your supplies.

Thank you so much for stopping by today as it's been such an honour to be here with you.
Hugs, Lydia x
Featured Supplies
For your convenience, here is a list of featured supplies (or equivalents) used on today's project(s), along with links to purchase. Please note: this list does contain some affiliate links.


Beautiful cards! I have that stamp set and will now be using for other cards, not just Christmas. Thank you for the inspiration.
ReplyDeleteBeautiful cards!)
ReplyDeleteThese are beautiful!! This set is on my wish list!!
ReplyDeleteJust lovely, what a versatile set! Have a most wonderful day. Cheers Donna Z :)
ReplyDeleteDelightful use of this festive set, which does not look at all Christmasy with your use of alternate colours. Just beautiful!
ReplyDeleteGorgeous cards and great video!
ReplyDeleteA lovely card, simple and quick but so much detail...thank you for the rock and roll lesson.
ReplyDeleteJust lovely!!
ReplyDeleteI really like your BEAUTIFUL card!!!!
ReplyDeleteTruly stunning Lydia.
ReplyDeleteBeautiful :-)
ReplyDelete