Friday, June 24, 2016

Friends For All Seasons: Summer with Joni

Hello everyone, Joni here sharing this cute images from Friends For All Seasons: Summer stamp set along with it's companion die.

To begin I did a lot of distressing for this scene using PURE COLOR Dye Ink in Last Leaf for the grass and Bo Peep for the hint of blue sky. For the fence I used the new Fence Border Die. I also used the Landscape Border Die to add dimension on the scene. For the dogs, kite and flowers, I simply watercolored them using ZIG Clean Color Real Brush in 60.

The "bonjour" speech bubble was also stamped and die cut from the Friends For All Seasons: Summer stamp set and companion die. I also added some dots using a light green Copic marker to finish off the card.

I hope you guys enjoyed this cute set. Thanks so much for stopping by!


Featured Supplies

For your convenience, here is a list of the supplies (or equivalents) used on today's project(s), along with links to purchase. Please note: this list does contain some affiliate links.

Wednesday, June 22, 2016

GUEST ARTIST FEATURE: Yoonsun Hur

Hello crafty friends, Yoonsun Hur here from Rejoicing Crafts! I am so happy to be a guest for Wplus9 today! Wplus9 is one of my favourite stamp companies for sure and oh, I am so honored!

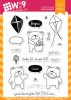
Today I am sharing a couple of my watercolour cards with some beautiful flower stamps - Beautiful Bouquet: Mums and Botanical Bunch.

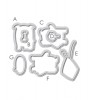
For my first card, I paired the new Beautiful Bouquet: Mums stamp set with the older Botanical Bunch stamp set. First, I stamped the image from the Beautiful Bouquet: Mums set onto watercolour paper with VersaFine Pigment Ink Onyx Black, and then filled in the bouquet even more with a few of the single floral images from Botanical Bunch. I trimmed the finished panel with a stitched rectangle die. Next, I watercoloured them with Kuretake Gansai Tambi Watercolor using a paint brush. For the sentiment, I stamped it from the Beautiful Bouquet: Ranunculus set on the watercoloured panel in black. Finally, I mounted the panel on an A2 sized kraft card base using dimensional foam tape.

I have another watercolour flower card featuring my all-time favourite, the Botanical Bunch stamp set. I tried to create a subtle, yet lovely watercolour effect.

First, I stamped the clustered flower image from the Botanical Bunch set at the top & bottom part of watercolour paper panel with Worn Lipstick Distress ink. I then brushed them with a bit of water using waterbrush. Next, I watercoloured the rest areas with Worn Lipstick , Picked Raspberry, Wild Honey, and Spiced Marmalade Distress inks using a wet paint brush, then added the Perfect Pearls Mist here and there.

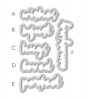
For the sentiment, I die cut the word “Hello” from white card stock using the Hand Lettered Hello Die four times and glued them together using a fine tip glue pen.

Once the panel was dry, I mounted it on an A2 sized white card base using double-sided tape, and then adhered the sentiment die cut at the centre of the card using a fine tip glue pen.

Thank you so much for joining me today!

Monday, June 20, 2016

Northern Lights with Kelly

Hello Crafters!

Do you remember on my last post I was talking about a card I had created but couldn't get to photograph well? I decided to share it anyway. Crafting is a wonderful community filled with inspiration at every turn even in the cards we don't love. Here's hoping that one of you finds some inspiration in this one.

I started by laying down the mountain border die and using it to mark how far down my sky needed to go on my card base.

After I had the area marked off, I began laying down color with my Copic markers using flat wide strokes. I prefer to start on the bottom and work my way up. I blended the green into a teal and then a tiffany blue. I moved up and added some more blue then finally pink and violet. While all of those colors really lit the sky up I need to add some dark back in. I picked some navy blues and set to work adding the night portion of the sky.

Copics can be difficult to blend when the colors have a large gap of color depth between the lighter and darker color. Keep adding color until your happy with it. As long as your working on thick quality cardstock it will take a lot of ink before you need to be concerned about the surface of your paper.

Since I had made my sky so bright I knew I needed to back light my mountains. I used distress inks to add color leaving the lightest edge on the mountain tops. I blended the bottom all the way out to black. In order to blend the middle sections without getting the edges I folded my round mini foam blenders in half and held them in my hand.

The sentiment was heat embossed after the distress ink was dry. Super important, make sure your distress ink is dry. Eeep, the mess that happens when you don't wait :/

I used the new dies that match the That is All stamp set to die cut the "amazing" after I stamped it on white. I finished it off with a few clear sequins.

If you're confused by any of the instructions just hold tight. The video will be up next week on the Wplus9 YouTube channel.

Thanks so much for stopping in!

Featured Supplies

For your convenience, here is a list of all of the supplies (or equivalents) used on today's project(s), along with links to purchase. Please note: this list does contain some affiliate links.


Connect with us:

Follow Us on Pinterest