Monday, October 31, 2016

Traditional Holiday Cards with Yana

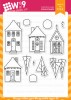
Hello everyone! This is Yana Smakula and today I thought I’d share a Holiday card using my first ever WPlus9 stamp set - Iconic Christmas. It is such a beautiful and classic set, ideal for traditional Holiday cards.

I bought this set a few years ago, but I don’t think I’ve ever used it on a card so I decided to show you another example of the Dry Embossing Technique I shared a few days ago and incorporate images from this stamp set along with its companion dies.

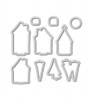
Because the dies that come with this set, since it's an older one, are solid and do not have the opening in the center they require a little different approach when doing dry embossing technique. I started by stamping two Christmas trees in Last Leaf ink onto a 4 ¼ by 5 ½ panel made out of Oatmeal card stock. I stamped images to the left and to the right of my panel leaving some space in the center for the main tree.

I used the companion die for the largest tree and dry embossed it in my die cutting machine in the center of my panel. Once I had my embossed outline I used mini MISTI and stamped the tree using Last Leaf ink. By the time the ink had some time to dry I realised that it was a bit too light, so I stamped images over the previously stamped ones using Appletini Ink. Some images ended up being slightly offset and I have to say I love this look.

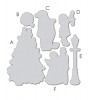
I die cut two lamp posts, two wreaths and one carolers shape out of white cardstock and stamped coordinating images using Old Gold, Appletini and Cranberry Crush ink colors.

I also heat embossed a sentiment and little sparkles to imitate the light coming out from the lampposts in gold embossing powder, added red and white bakers twine and foam mounted my die cut images on top.

I hope this card has given you an additional idea how you can use dry embossing technique in your cardmaking.

Have fun stamping!

Featured Supplies

For your convenience, here is a list of the supplies (or equivalents) used on today's project(s), along with links to purchase. Please note: this list does contain some affiliate links.

Sunday, October 30, 2016

GUEST ARTIST FEATURE: Amy Rysavy

Hello everyone! Amy Rysavy here and I am very excited to be guest designing for WPlus9 today! I have to share with y'all that these are the first Holiday/Christmas cards I've made this season. I've been so focused on fall and Halloween cards that I've put off making anything winter/Christmas themed but I couldn't put it off any longer!

Watch above or watch in HD at YouTube

I fell in LOVE with the WPlus9 Holiday 2016 Collection – so many fabulous holiday stamps and dies! I had a really hard time narrowing down what I was going to create for my post today. However the Holiday Houses stamp set was just begging to be used so I went with that and it's companion die set along with the new Be Merry Sentiments and 4-Bar Stitched Rectangles Dies.

I stamped all the images from the Holiday Houses stamp set onto hot press watercolor paper using Versamark ink and heat embossed them with Ranger's Super Fine Detail White embossing powder. Since I had lined up all the images onto my Mini Misti I was able to quickly stamp and emboss a second set of images and make 2 cards instead of just one.

I watercolored in all the images with my Mission Gold watercolors using a Silver Size 4 watercolor brush. Once they were dry I die cut them all using the coordinating die set and my Big Shot machine.

For the backgrounds of these cards I sponged several different Tim Holtz Distress Inks to create a sky that looks like it's glowing with lights from the houses while night is starting to fall. I spritzed the sponged backgrounds with my Distress Spray bottle to get the ink to react with the water, then when it was dry I flicked on a copious amount of Copic Opaque White paint (my FAVORITE) that I had thinned down just a bit with water. This created the "snowfall" on the background.

As a final touch after I'd assembled these cards I lightly dabbed on some Frosted Lace Stickles to the tops of all the houses and trees and along the snowdrifts. It just added some extra dimension without adding a ton of "sparkle" that I think would take away from the overall scene.

For those that aren't familiar with my cardmaking style – I ALWAYS have to finish the inside of my cards! They aren't done until the inside has something. For these cards I added the remaining watercolored houses and trees to the lower left of the inside, then stamped the sentiments from the Be Merry Sentiments stamp set and that was it!

Thank you all so much for joining me today here on the WPlus9 blog! I had so much fun creating these cards and I hope you all enjoyed seeing the process! - Amy Rysavy

Featured Supplies

For your convenience, here is a list of the supplies (or equivalents) used on today's project(s), along with links to purchase. Please note: this list does contain some affiliate links.

Connect with us:

Follow Us on Pinterest