Tuesday, February 27, 2018

GUEST ARTIST FEATURE: Emily Midgett

Hi there! Emily Midgett here with you today from Sixth Street Sundries. I’m so grateful and so thrilled to have been asked to create a guest post for the Wplus9 blog. I completely and totally blame Dawn’s genius for my coloring obsession; one of her videos using Distress Inks for watercolors was the start of my interest in coloring my stamps, and that interest has turned into a full blown obsession.

If you visit my blog, you will see that color is one of my favorite elements of card making. I love utilizing unique color combinations on my cards, and today, I’m going to show you a few tips and tricks to help you add pops of color on your colored card stock using a layer of white as a “primer.” I have a video demonstrating two different techniques:


Watch above or watch in HD at YouTube

As you might have guessed, my inspiration for today’s projects were from the beautiful artwork from Rifle Paper Company. For the first technique, I use white pigment ink to act as a barrier between the colored card stock and the dye ink. I start by stamping the first layer of each layered stamp from Southern Summer Florals 2 using white pigment ink to create my background pattern.

To create my own custom floral background, I start by stamping the largest image on my background, then the next largest image, and work my way down to the smallest image to fill in any holes. After I had all of my pattern stamped in white, I used the same solid stamps to stamp over the white images, this time using Wplus9 dye inks. The white pigment layer helps to act as a kind of "primer" to help keep the brightness of the colored card stock from distorting the color of the dye ink. Even the greens, which on those bright pinks and corals would have turned to a muddy mess, look vibrant with the addition of the layer of white.

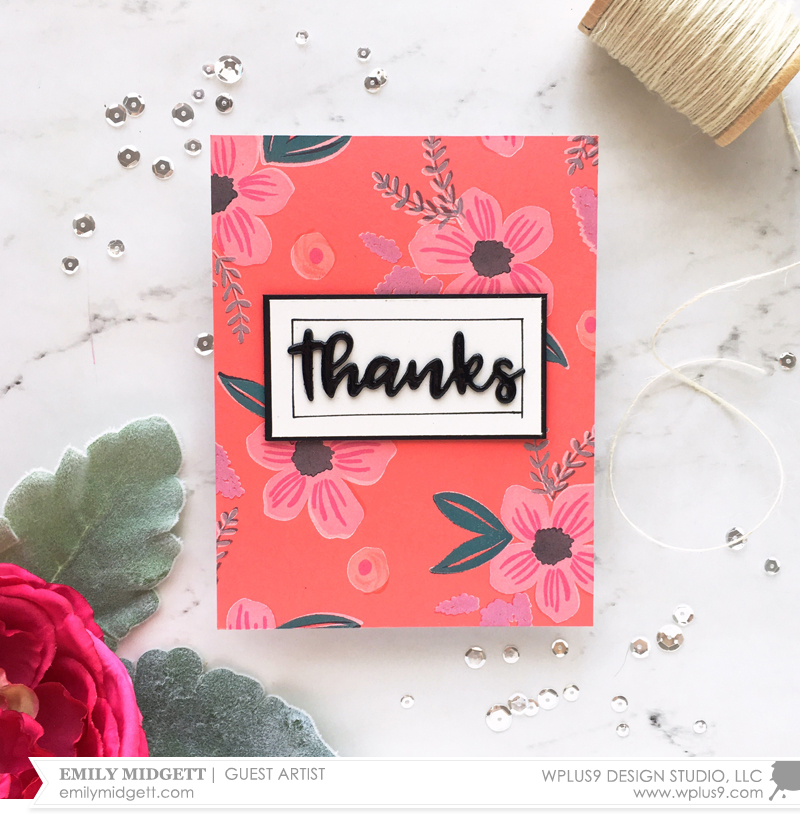
Once you have a design in mind, this technique can really create some lovely, quick backgrounds. The flowers from Southern Summer Florals 1 and 2 are so lovely that you don't really need much else to make a card from them; here, I've created three cards with a similar style and color scheme, using some simple greetings from Grateful Greetings, Hand Lettered Thanks and the matching dies, and Basic Greetings dies.

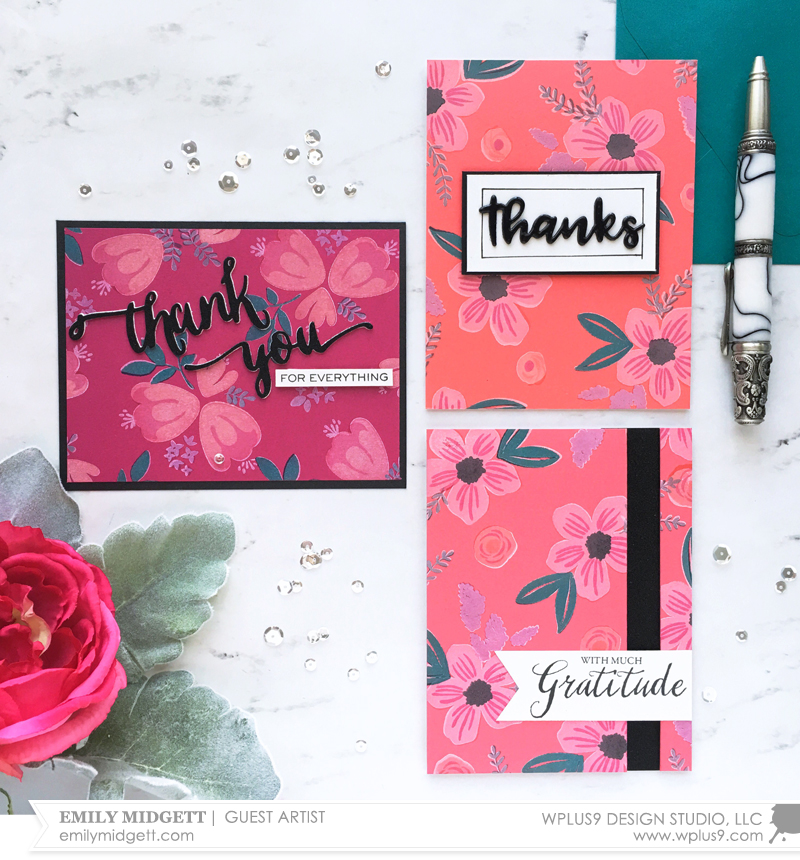
Which color scheme is your favorite?

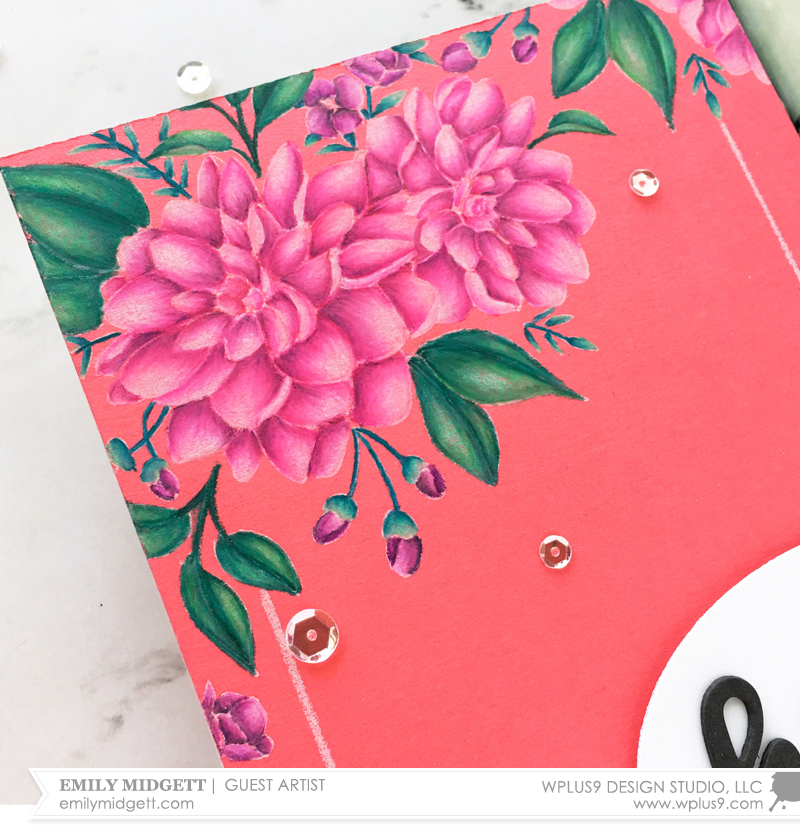
For my second technique, I wanted to show how you could use a while pencil with your colored pencils on colored card stock to create a really bright and vibrant image. The technique is essentially the same as the previously mentioned technique; stamp your image using white pigment ink, then lay down a layer of white pencil before adding your color over the top.

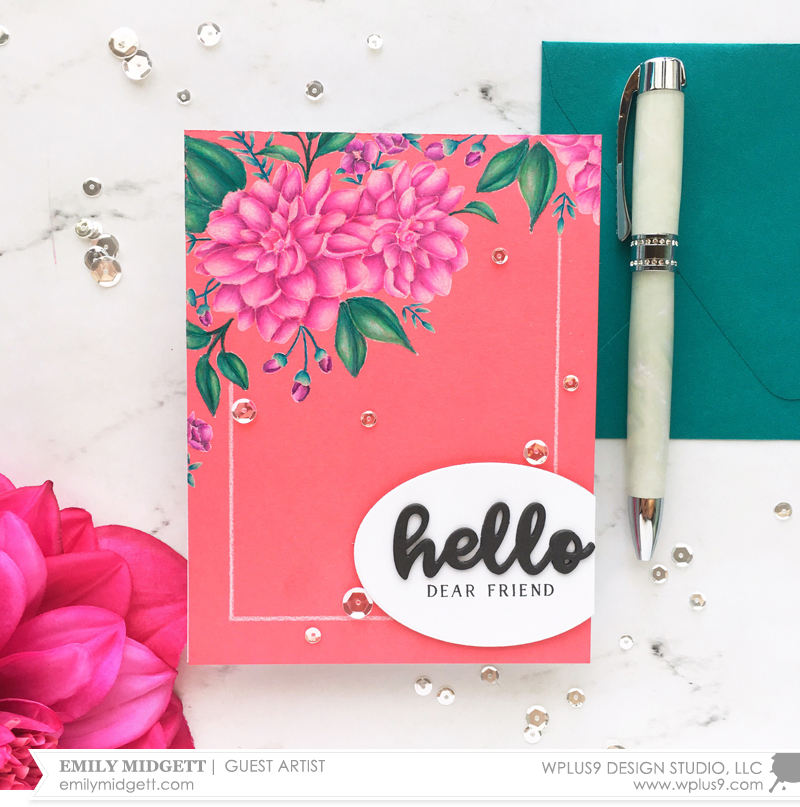
For this card, I used the Beautiful Bouquets: Dahlia stamp set, stamped a few times in white pigment ink in the corner of my coral card stock. Then, moving petal by petal so as to keep the edges of the petals nice and crisp, I add the colored pencils, starting with the darkest shades towards the center of the flower, and blending the colors out using my Prismacolor blender pencil. (You can watch the step by step process in the video if you are having difficulty visualizing this process!)

After I had colored my floral swag in the top corner of the coral panel, I added a greeting using the hello die from the Basic Greetings die set that I die cut three times and adhered together to create a dimensional die cut. I paired this with a sentiment from the Beautiful Bouquet: Dahlia stamp set stamped in black on an oval from the Anastasia Tag Dies. I used my T-square and white pencil to create a rectangular frame around the edge to help draw the eye down towards the greeting.

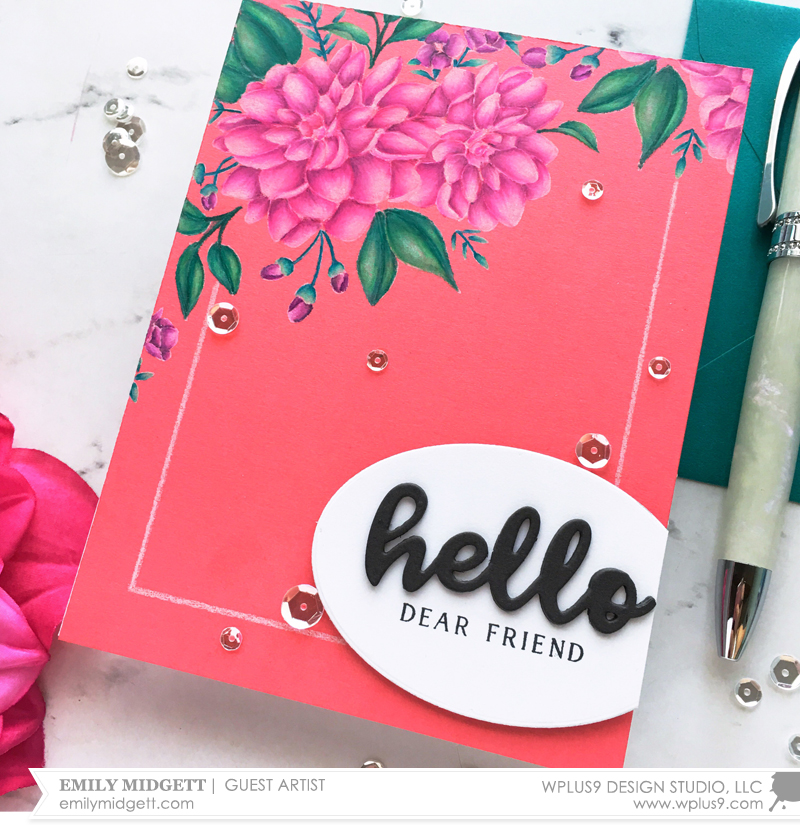
The final touch was to add some sparkly sequins to add a bit of texture and sparkle!

Well, that's all for me! (If you made it to the end of this extra long post, bravo to you and thank you for sticking with me!) I want to send Dawn a massive thank you for allowing me to be a guest on the Wplus9 blog. It's been an honor and a pleasure!! I hope I was able to share something useful with you! Have a marvelous day!

~Emily

Featured Supplies

For your convenience, here is a list of the featured Wplus9 dies used on today's project(s), along with links to purchase.

Wplus9 PURE COLOR Black Dye Ink
Shop at:
WP9
Wplus9 PURE COLOR Lake House Dye Ink
Shop at:
WP9
Wplus9 Basic Greetings Die
Shop at:
WP9
Wplus9 Beautiful Bouquet: Dahlia Stamps
Shop at:
WP9
Flamingo PURE COLOR Dye Ink
Shop at:
WP9
Little Piggy PURE COLOR Dye Ink
Shop at:
WP9
Sweet Gelato PURE COLOR Dye Ink
Shop at:
WP9
Siren Song PURE COLOR Dye Ink
Shop at:
WP9
Wplus9 Southern Summer Florals 1
Shop at:
WP9
Wplus9 Southern Summer Florals 2
Shop at:
WP9
Wplus9 Grateful Greetings
Shop at:
WP9
Wplus9 Hand Lettered Thanks
Shop at:
WP9
Wplus9 Hand Lettered Thanks Die
Shop at:
WP9
Wplus9 Anastasia Tag Die
Shop at:
WP9
Bloomsberry PURE COLOR Dye Ink
Shop at:
WP9
Sweet Nectar PURE COLOR Dye Ink
Shop at:
WP9

Monday, February 26, 2018

Stitching On Black Cardstock With Kara

Hey guys it's Kara. I know you have been loving these stitching dies as much as I have! There are so many ways to use them and today I thought I'd share a look at stitching on black cardstock.

Originally, when using this large heart from Needle Point Hearts, I went right to white cardstock thinking that the floss would pop. However, if you choose the right colors, your floss will pop on black too! Play around and try different colors. I knew I wanted to use white and hot pink seemed like another natural choice. When I laid the floss on my cardstock it looked great!

I just did some simple stitching around the heart starting with white on the outsides, moving to light pink and then finally a darker pink in the center. I added a sentiment from Bold Banner Greetings on a simple banner die cut from Bountiful Blooms. I didn't want to cover up too much of the stitched heart.

Super simple, and super sweet! Thanks so much for stopping by today!

Featured Supplies

For your convenience, here is a list of the featured Wplus9 dies used on today's project(s), along with links to purchase.

Wplus9 White Cardstock
Shop at:
WP9
Wplus9 Black Cardstock
Shop at:
WP9
Wplus9 4 Bar Stitched Rectangles Die
Shop at:
WP9
Wplus9 PURE COLOR Black Dye Ink
Shop at:
WP9
Wplus9 Needle Point Hearts
Shop at:
WP9
Wplus9 Bountiful Blooms Die
Shop at:
WP9

Sunday, February 25, 2018

Guest Artist Feature: Cynde Whitlow

Hey folks!

It’s Cynde and and I’m so happy to be here with you today and show you how to make an Ice Cream Cone Bouquet.

Wplus9 released some really cool dies this month. I share a couple of them in the video, but there are several more in the Stitched Details Die Collection that you should also check out if you haven't already.

Sewing is my first love. I’ve been sewing for as long as I can remember. Unfortunately, I had to give up any kind of hand sewing. However, I wanted to still be able to use some of the Stitched Details Dies. So I thought, why not mix it up and do some stamping and stitching?

You can watch the video below, where I walk you through the whole process.


Watch above or watch in HD at YouTube

I didn’t want to do any masking, but I wanted detail and I really wanted to build a big bouquet to set inside my ice cream cone. Wplus9 has some really great builder sets folks. The Freehand Florals stamp set is one of my faves because it has such a light feel to it and it’s so easy to line up! I love these in blue-green, so I had to stamp a few using Sea Breeze, Ocean Drive and Siren Song Inks.

I also used the Rose Builder and Petunia Builder stamp sets. I fussy cut almost all of the flowers I stamped. But, if fussy cutting isn't your "thing", then I highly recommend getting the companion dies. Dies definitely save time!

You could make this bouquet in any colors you wanted. I was going for more blues and pinks. For some of my flowers I used, Lake House, Bo Peep and Falling For Blue. That bright pink is the newly released V.I.Pink, it sure does pack a punch! I'll have all of the ink colors used listed below.

A card like this doesn’t need much to finish it off, so I used the Love Showers Layers Die and cut one of the hearts and the word “Love” from gold foil cardstock. Just a few gold sequins to finish it up and I called it a day!

That’s it! Do be sure to watch the video folks. It’s such a fun process.

As always, I hope you enjoyed my card today! I had a blast! Thanks so much for stopping by. ~Cynde

Featured Supplies

For your convenience, here is a list of the featured Wplus9 dies used on today's project(s), along with links to purchase.

Wplus9 PURE COLOR Lake House Dye Ink
Shop at:
WP9
Wplus9 PURE COLOR Nautical Navy Dye Ink
Shop at:
WP9
Wplus9 Rose Builder Stamp Set
Shop at:
WP9
Wplus9 Needle Point Hearts
Shop at:
WP9
Wplus9 Sweet On You
Wplus9 Sweet On You
Shop at:
WP9
Wplus9 Love Shower Layers Die
Shop at:
WP9
Wplus9 V.I.Pink Dye Ink
Shop at:
WP9
Wplus9 Gift Card Layers Die
Shop at:
WP9
Wplus9 Free Hand Florals Stamp Set
Shop at:
WP9
Wplus9 Petunia Builder Stamp Set
Shop at:
WP9
Little Piggy PURE COLOR Dye Ink
Shop at:
WP9
Sweet Gelato PURE COLOR Dye Ink
Shop at:
WP9
Falling Star PURE COLOR Dye Ink
Shop at:
WP9
Hayride PURE COLOR Dye Ink
Shop at:
WP9
Pumpkin Spice PURE COLOR Dye Ink
Shop at:
WP9
Miami SpicePURE COLOR Dye Ink
Shop at:
WP9
Beanstalk PURE COLOR Dye Ink
Shop at:
WP9
Last Leaf PURE COLOR Dye Ink
Shop at:
WP9
Sea Breeze PURE COLOR Dye Ink
Shop at:
WP9
Ocean Drive PURE COLOR Dye Ink
Shop at:
WP9
Siren Song PURE COLOR Dye Ink
Shop at:
WP9
Bo Peep PURE COLOR Dye Ink
Shop at:
WP9
Falling For Blue PURE COLOR Dye Ink
Shop at:
WP9

Connect with us:

Follow Us on Pinterest