Showing posts with label Big Deal. Show all posts

Wednesday, August 1, 2018

Wild Birthday w/Kara ft. BIG DEAL

Hey Guys! It's Kara here today and I'm headed to a wild birthday party this weekend! My youngest cousin, James, is turning 6!

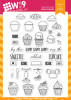
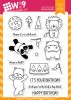
I hope he loves this card. I do and I'm a little bit older than he is. ;) For this bright, fun scene I used Big Deal and Big Deal Additions stamp sets and their coordinating die sets. These sets make it so easy to create an exciting little circus scene. I chose the pandas because James loves them. I stuck to just 3 bright Copic colors to make it simple to color.

Each die cut is doubled up with foam adhesive in between to add dimension and interest from all angles. A few stars stamped in the background finish it off!

Thanks so much for stopping by today!

Featured Supplies

For your convenience, here is a list of the featured Wplus9 supplies used on today's project(s), along with links to purchase.

Wplus9 White Cardstock
Shop at:
WP9
Wplus9 Black Cardstock
Shop at:
WP9
Wplus9 4 Bar Stitched Rectangles Die
Shop at:
WP9
Wplus9 PURE COLOR Black Dye Ink
Shop at:
WP9
Big Deal
Big Deal
Shop at:
WP9
Dig Deal Die
Dig Deal Die
Shop at:
WP9
Big Deal Additions
Big Deal Additions
Shop at:
WP9
Big Deal Additions Die
Shop at:
WP9

Saturday, July 29, 2017

GUEST ARTIST FEATURE: Cynde Whitlow

Hey folks! I’m Cynde Whitlow from The Pink Envelope. I am so honored and excited to be on the Wplus9 Blog today! When I was asked to guest design - and after I fan girled a little (maybe a lot) - my mind immediately started planning how I could color those amazing floral images they are so well known for. However, I also thought it would be super groovy to shake it up a bit and put together something a lil out of the ordinary and crazy fun! So, today I’m using Big Deal, Unforgettable, Sweets & Treats, Fresh Preserves and A Pocketful: Valentine to create a Circus Birthday.

Before I stamped anything I did two things, First, I cut masks from full stick Post-It Notes. Now, I know it’s A LOT folks, but I promise the planning ahead and taking the time to cut them all out is so worth it. Plus you can double up your Post-It Notes and that makes cutting them out super easy. Second, using a T-Square Ruler and a pencil, I lightly traced a line across my panel a little over a 1/4” from the bottom. This will be my guide as I start stamping my images.

Using my MISTI Stamping Tool, I started stamping all of my images in a Copic friendly black ink. Keep in mind folks, when masking, your foreground images get stamped first. The MISTI makes this job easy peasy. For example, I could stamp the lemon/cherry image and the single cherry from Sweets & Treats and the little ball from Big Deal at the same time. These little images seem trivial, but they make for great details on the finished card!

To make sure I would have enough room for my jar, I placed it in my panel and then added the 2 cupcakes from Sweets & Treats where I wanted them. I closed the MISTI door and picked up the cupcakes. Since I knew I would have enough room for the jar now, I stamped more cupcakes from Sweets & Treats and I really wanted to play up the circus theme so I used the lion, the panda and the bear from Big Deal. However, I didn't stamp the panda just yet. I made sure to stagger and spread out my images. I wanted a full card.

I thought the big ball in Big Deal would make a super fab balloon, so I stamped that three times on my panel. I did leave room for the balloon from Unforgettable, because the solid balloon would help give the eye some rest from the patterns on the other “balloons”.

Again, I placed the jar from Fresh Preserves onto the panel. Then, I placed my panda on top of that and since I had room, I placed the lollipops from A Pocketful: Valentine on top of the jar and closed the door of them MISTI to pick them both up. After I was finished stamping those, I placed my jar on to the panel again. This time I was ready to ink it up.

The jar stamp in Fresh Preserves actually has a solid lid on it. I wanted mine to be see through. For starters, the solid black would cover some of my Panda and also, I liked the idea of seeing the lollipop sticks go down into the jar. So to make it look like a jar with no lid, I only inked up the stamp to the point where the jar meets the lid. After I stamped it, I put my jar mask over the stamped image and using a Copic Multiliner, I carefully traced around the top of the mask. Then I removed the mask and added lines where a jar would be threaded.

Then I masked off the panda, his hat, and around the outside of the jar and stamped “gum balls” using the little ball from Big Deal. This seems CUH-RAZY since there are so many. The trick is to cut about 4 masks and then you’re only stamping what will be the most visible. You then make the little gaps in between look like gum balls when you start coloring.

At this point, I did start coloring. I really played up the traditional circus colors and Copic colored all of my images in Red, Yellow and Blue. I wanted to reinforce the idea that these guys are sitting on a counter or table in the midst of the treats, so I just added shadows in Grey Copic’s to ground them and left quite a bit of white.

If you have the Big Top Background the background would be easier yet, but I simply masked of stripes using Post-It Labeling Tape in diagonal stripes and ink blended Wplus9 Gala Red Pure Dye Ink with a Ranger Mini Ink Blending Tool.

The main attraction (ha ha, no pun intended) of this card IS the scene, so I skipped the sentiment and any embellies. I did however use a Sakura Clear Glaze Pen on all of gum balls not in the jar, as well as the cherries. Clear Wink of Stella belongs on every card, so I highlighted the balloons, the icings and the ties on the lollipops. I also used a Sakura White Glaze Pen to reinforce the highlight on the jar as well as the stars and circles in the balloons.

That’s it! Thanks so much for stopping by to see me. A monster thank you to Dawn (& crew) for inviting me to play! This was truly a BLAST! I hope I’ve inspired you to think outside of the box, use up those stamps people and create something fun!

Have a great day folks! ~Cynde

Featured Supplies

For your convenience, here is a list of the featured Wplus9 supplies used on today's project(s), along with links to purchase.

Thursday, June 29, 2017

Birthday Wishes Watercolor Pattern Card w/Yana

Hello friends! This is Yana and I hope you are having a fabulous week!

Today I’m sharing how to quickly stamp a custom pattern for a Birthday card using images from the Big Deal & Big Deal Additions stamp sets and also how to easily watercolor them using the wet-on-wet watercolor technique.

I picked 3 images to stamp my pattern - a hippo, a lion and unicycle and stamped them repeatedly and in the same order using black ink waterproof. You can easily stamp patterns like this one using multitude of various images; for a pattern like this I would recommend you go with images that are about the same size. The lion here is a bit taller but not so tall as to distort my pattern.


Watch above or watch in HD at YouTube

Depending on how you want to color your pattern later you'll need to pick appropriate type of paper and ink for your stamping. Since I wanted to watercolor I went with Arches Hot Pressed watercolor paper and Versafine Onyx Black ink which is a waterproof ink.

I also heat embossed my pattern after stamping in clear embossing powder to make watercolor process go a bit faster. The razed embossed edge serves as a barrier when watercoloring different sections and allows to color faster.

If you are not into coloring, you can heat emboss or stamp this pattern onto colored cardstock or maybe even strips of colored cardstock and have a colorful background composed of colored cardstock blocks and maybe white or black stamped images, so you don't have to color a pattern if you don't enjoy coloring.

I used Daniel Smith watercolors to color these, I am still using my Dot Chart (I describe it in detail in this video here - be sure to watch it if you are not familiar with these watercolors ) and did very simple wet on wet coloring. I wet my image with a brush and clean water first, next came in with some pigment and added it to the sections I wanted to be darkest on my image.

After my coloring was done I trimmed my panel and adhered it onto an A2 top folding card base. I also added a white heat embossed sentiment that reads “Birthday Wishes to The Greatest Person on Earth” and added black enamel dots to complete this project.

I’d like encourage you to pick a few critter images of similar size and stamp a quick pattern. Color it or go with colored cardstock instead and just have fun creating!

Have fun stamping!

Featured Supplies

For your convenience, here is a list of the featured supplies used on today's project(s), along with links to purchase. Please note: this list contains affiliate links.

WPlus9 Big Deal Stamp Set
Shop at: WP9
WPlus9 Big Deal Additions Stamp Set
Shop at: WP9
Neenah 110 Lb Solar White Cardstock
Shop at: SSS | AZ
Simon Says Stamp Black Cardstock
Shop at: SSS
Arches Hot Pressed Watercolor Pad 9x12"
Shop at: SSS | AZ
Hero Arts Heat Embossing Gun PW200
Shop at: SSS | SC | HA | AZ
Hero Arts White Embossing Powder PW110
Shop at: SSS | SC | HA | AZ
Versamark Watermark Emboss Ink Pad
Shop at: SSS | HA | AZ
ScraPerfect Crafting Pouch
Shop at: SSS | AZ
Tsukineko VersaFine Onyx Black Ink
Shop at: SSS | AZ
Daniel Smith Extra Fine Watercolor 238-Dot Color Chart
Shop at: AZ
Daniel Smith Extra Fine Watercolor 15ml Paint Tube, Graphite Gray
Shop at: AZ
Daniel Smith Extra Fine Watercolor 15ml Paint Tube, Goethite-Brown Ochre
Shop at: AZ
Daniel Smith Extra Fine Watercolor 15ml Paint Tube, Quinacridone, Deep Gold
Shop at: AZ
Daniel Smith Extra Fine Watercolor 15ml Paint Tube, Quinacridone, Red
Shop at: AZ
Medium Water Brush
Medium Water Brush
Shop at: SSS
Hero Arts Clear Embossing Powder PW104
Shop at: SSS | AZ
EZ Runner Grand - Permanent
Shop at: SC | AZ
EZ Runner Grand - Permanent - Refill
Shop at: SC | AZ
Doodlebug Beetle Black Sprinkles Assortment
Shop at: SSS | AZ
Scrapbook Adhesives Black Foam Tape
Shop at: SSS | AZ

Wednesday, May 24, 2017

Circus Pandas Scene Building with Kelly

Hello Crafters! Today we are talking birthdays. We can all use more birthday cards, especially when they are extra adorable, am I right?

Birthdays are really at the forefront of my mind because my little peanut just had a birthday on Monday. My guy is 4 years old already and I have no idea how that happened. Eeeep! Stop growing.

I embraced the circus theme for today's card because, you know, I was dying to make a one layer scene with all these cuddly circus critters. Decisions had to be made because there's only so much room on a card. So I opted for the panda's today.

You can watch the entire scene come to life in the video below.


Watch above or watch in HD at YouTube

I love how they look like they're swinging way above the crowd just like at the live circus. This is why I love one layer cards, because when you get it, man it's so cool!

We all know I'm a one layer girl all the way. What's your favorite kind of card to make?

Thanks so much for dropping by!

Featured Supplies

For your convenience, here is a list of the featured supplies used on today's project(s), along with links to purchase. Please note: this list may contain some affiliate links.


Wplus9 White Cardstock
Shop at:
Wplus9
Wplus9 Big Deal Additions
Shop at:
SSS | Wplus9
Wplus9 Black Dye Ink
Shop at:
Wplus9
Wplus9 Hayride Dye Ink
Shop at:
Wplus9
Wplus9 Big Top Background
Shop at:
Wplus9
Wplus9 Big Deal
Wplus9 Big Deal
Shop at:
Wplus9
EK Success WRITING PEN FINE TIP
Shop at:
SSS
Fiskars PREMIUM CUT LINE Paper Trimmer 12 Inches
Shop at:
SSS
Tombow MONO MULTI Liquid Glue
Shop at:
SSS
Martha Stewart SCORING BOARD
Shop at:
SSS
Simon Says Stamp LARGE GRID PAPER Pack Pad
Shop at:
SSS
Pretty Pink Posh 6MM SPARKLING CLEAR Cupped Sequins
Shop at:
SSS
Pretty Pink Posh 4MM SPARKLING CLEAR Cupped Sequins
Shop at:
SSS
Simon Says Stamp Premium Ink Pad INTENSE BLACK
Shop at:
SSS
ZIG Wink of Stella GLITTER CLEAR Brush Tip Marker
Shop at:
SSS
MINI MISTI PRECISION STAMPER Stamping Tool Kit
Shop at:
SSS
3M CANARY YELLOW Post-It Super Sticky Notes
Shop at:
SSS
3M 2 INCH WIDE POST-IT TAPE
Shop at:
SSS
Copic Sketch Marker E53 RAW SILK
Shop at:
SSS
Copic Sketch Marker E55 LIGHT CAMEL
Shop at:
SSS
Copic Sketch Marker E59 WALNUT
Shop at:
SSS
Copic Sketch Marker C1 COOL GRAY
Shop at:
SSS
Copic Sketch MARKER C3 COOL GRAY
Shop at:
SSS
Copic Sketch MARKER YG99 MARINE GREEN
Shop at:
SSS
Copic Sketch Marker R32 PEACH
Shop at:
SSS
Copic Sketch Marker R35 CORAL
Shop at:
SSS
Copic Sketch Marker R29 LIPSTICK RED
Shop at:
SSS
Copic Sketch Marker R59 CARDINAL
Shop at:
SSS
Copic Sketch Marker R20 BLUSH
Shop at:
SSS
Copic Sketch Marker B99 AGATE
Shop at:
SSS

Connect with us:

Follow Us on Pinterest