Hello everyone! This is Yana here and today I’d like to share a set of stamped Valentine’s Day cards. This card design can also be used for Wedding Cards or even to create one of a kind Wedding Invitations.

I started working on these by stamping beautiful floral heart-shaped wreath from the Fresh Cut Wreath stamp set. If you’d like to re-create these cards and would like to stamp a background like the one I stamped on some of these it is best to start with the background first and later stamp the wreath and sentiment.

Watch my video tutorial below to see cardmaking process from start to finish and learn from my mistakes:
Watch above or watch in HD at YouTube
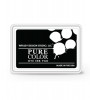
Light gray, pink and white is my go-to color combination for Valentine’s Day. To spice it up for my today’s cards I also added a hint of yellow. I used PURE COLOR Dye ink in Silver Lining, Hayride, Wild Mango, Shell Pink and Little Piggy to stamp the wreath and also Fairy Dust to stamp the background pattern. You can always go with brighter colors if you prefer.

The background pattern, by the way, comes from another set from WPlus9 - Dockside Backgrounds. I recently used another image from that set to add some interest to a one layer stamped encouragement card. Even though it is a nautical set I find myself reaching for it more and more often to create everyday projects.

For my sentiments I went with the new Whimsy Alpha. I love how big and bold the letters are and for these cards I only used solid stamps and completely skipped detail layers with dashed or dotted outlines. I used same colors of ink and stamped simple messages like “Kisses For You”, “Love You” and “Adore You”.
To help my pastel stamping stand out I adhered these panels onto A2 top folding card bases made out of Coal Mine cardstock from WPlus9.
Have fun stamping!

Featured Supplies
For your convenience, here is a list of the supplies (or equivalents) used on today's project(s), along with links to purchase. Please note: this list does contain some affiliate links.
 WPlus9 Fresh Cut Wreaths Stamps
WP9
WPlus9 Fresh Cut Wreaths Stamps
WP9 |
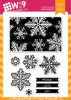
 Wplus9 Dockside Backgrounds Stamps
WP9
Wplus9 Dockside Backgrounds Stamps
WP9 |
 WPlus9 Whimsy Alpha Stamps
WP9
WPlus9 Whimsy Alpha Stamps
WP9 |
 Wplus9 Hand Lettered Thanks Stamps
WP9
Wplus9 Hand Lettered Thanks Stamps
WP9 |
 WPlus9 Hayride Dye Ink
WP9
WPlus9 Hayride Dye Ink
WP9 |
 WPlus9 Wild Mango Dye Ink Pad
WP9
WPlus9 Wild Mango Dye Ink Pad
WP9 |
 Wplus9 Shell Pink Dye Ink
WP9
Wplus9 Shell Pink Dye Ink
WP9 |
 WPlus9 Little Piggy Dye Ink
WP9
WPlus9 Little Piggy Dye Ink
WP9 |
 WPlus9 Fairy Dust Dye Ink
WP9
WPlus9 Fairy Dust Dye Ink
WP9 |
 WPlus9 Silver Lining Dye Ink
WP9
WPlus9 Silver Lining Dye Ink
WP9 |
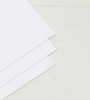
 WPlus9 White Cardstock
WP9
WPlus9 White Cardstock
WP9 |
 WPlus9 Coal Mine Cardstock
WP9
WPlus9 Coal Mine Cardstock
WP9 |
 Prismacolor 150 Premier Colored Pencils
SSS
Prismacolor 150 Premier Colored Pencils
SSS |
") Pretty Pink Posh 4MM Clear Droplets (small)
SSS
Pretty Pink Posh 4MM Clear Droplets (small)
SSS |
") Pretty Pink Posh 6MM Clear Droplets (medium)
SSS
Pretty Pink Posh 6MM Clear Droplets (medium)
SSS |
 Mini Misti Stamping Tool
SSS | SC | AZ
Mini Misti Stamping Tool
SSS | SC | AZ |
 Misti Stamping Tool
SSS
Misti Stamping Tool
SSS |
 Uni-ball Pen Signo Gel White Two Pack
SSS
Uni-ball Pen Signo Gel White Two Pack
SSS |
 EZ Runner Grand - Permanent
SC | AZ
EZ Runner Grand - Permanent
SC | AZ |
 EZ Runner Grand - Permanent - Refill
SC | AZ
EZ Runner Grand - Permanent - Refill
SC | AZ |
 Sakura Quickie Glue Pen
SSS | AZ
Sakura Quickie Glue Pen
SSS | AZ |