Showing posts with label Joni Nina Andaya. Show all posts

Thursday, September 13, 2018

Celebrating Autumn w/Joni ft. AUTUMN BLESSINGS

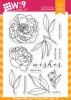
Hello Everyone, Joni here sharing my take on this gorgeous flower set from Wplus9 X Stephanie Low Creative - Autumn Blessings. Autumn tends to get overshadowed by Christmas in the card making world. Don't you think? The Autumn window seems to last a week or two and then it's on to Christmas for what seems like months!

But, the autumnal color palettes are so stunning! It's such a shame not to take advantage. And the sunflowers in this set scream "cover me" in all of those beautiful colors!

I know we typically see sunflowers depicted in yellow. But did you know that they actually bloom in gorgeous shades of yellows and golds, oranges, reds and rusts, and even some corals?

To begin my card I first stamped the images on a white cardstock with a Versafine Onxy Black Ink. To color the images, I used Copic Markers and then die-cut each image with it's corresponding die.

Next, I distressed my background using Distress Oxide Ink in Peacock Feather and then splattered the background using Distress Ink in Worn Lipstick and Frayed Burlap.

To finish this card I added some Jewels from Pretty Pink Posh. Here's another look of the finished card.

I hoped you enjoyed! And I hope this inspires you to do some Autumn inspired crafting!

Thank so much for stopping by.

Featured Supplies

For your convenience, here is a list of the featured Wplus9 supplies used on today's project(s), along with links to purchase.

Wplus9 White Cardstock
Shop at:
WP9
Autumn Blessings
Autumn Blessings
Shop at:
WP9
Autumn Blessings Die
Shop at:
WP9

Tuesday, March 6, 2018

Hey Sweetie Shaker Card w/Joni

Hello Everyone, Joni here sharing an easy fun male card using the new Sucker For You Die.

To begin, I first die-cut my card base from Kraft cardstock with a size of an A2 card. Then I die-cut a white cardstock and vellum using the stitched scallop from Sunshine Layers Die.

Next, I die-cut the fun pieces from the Sucker For You Die for the focal point of the card.

I created a standard shaker card from the base, and adhered the sucker pieces to the front of the vellum. To fill the shaker, I used the star confetti from Pretty Pink Posh, glueing a few stars directly to the vellum on the inside. This way some of the stars will stay up and the others will fall down for your shaker.

And here's another look at the finished card all assembled.

I hope you liked this fun card! Until next time...

Featured Supplies

For your convenience, here is a list of the featured Wplus9 dies used on today's project(s), along with links to purchase.

Wplus9 White Cardstock
Shop at:
WP9
Wplus9 Black Cardstock
Shop at:
WP9
Wplus9 Sucker For You
Shop at:
WP9
Wplus9 Kraft Cardstock
Shop at:
WP9
Wplus9 Sunshine Layers Die
Shop at:
WP9

Monday, December 18, 2017

Stretching Your Stash with Joni

Hello everyone, Joni here sharing my take on making holiday card with non-holiday stamps. For this project I used the Hand Lettered Holiday Die, Silver Bells, and Beautiful Bouquet: Ranunculus.

To begin my card I first layout my image and stamped on a white cardstock.

Next, I colored them with Copic markers. The colors you choose for your images can dictate the theme you are trying to convey.

For this card I used the sentiment from Silver Bells and "merry" from the Hand Lettered Holiday Die.

For my finish card I added some Pretty Pink Posh Snowflake sequins and Sparkling Clear Confetti.

I hope you enjoyed today's project! Have an Amazing Day!

Featured Supplies

For your convenience, here is a list of the featured Wplus9 supplies used on today's project(s), along with links to purchase.

Wplus9 White Cardstock
Shop at:
WP9
Wplus9 PURE COLOR Black Dye Ink
Shop at:
WP9
Beautiful Bouquet: Ranunculus
Shop at:
WP9
Silver Bells
Silver Bells
Shop at:
WP9
Hand Lettered Holiday Die
Shop at:
WP9

Monday, December 4, 2017

Vintage Happy Holidays with Joni

Hello Everyone! Joni here sharing some of my favorite holiday stamps from Wplus9. Merriest Wishes, Merry Little Christmas, Holiday Boughs, and Holiday Trimmings.

First, I stamped the elf from Merriest Wishes and colored him with Copic Markers. Next I distressed the background using a sponge dauber using Fairy Dust Dye Ink and distressed the same spot with the Sea Breeze Dye Ink. This give more of a vintage look I am going for.

Then, I splattered the background with Winsor and Vewton gouache in white, to give that snowy background to the card. Next, I finish off the card by stamping the sentiment "Happy Holidays" from Holiday Boughs. I inked the stamp using Versamark ink and heat embossed it using gold embossing powder.

I used the same background technique for the next card. But this time I used the retired Merry Little Christmas stamp set and colored the image with Copic Markers. Although this set is retired, it is always nice to have some fresh inspiration for those that may already own it, right? And ways to use your older stash with newer items is always a plus!

After distressing the card and splattering it, I then stamped the Holiday Boughs on the top of the card. I also added some red Stickles on the ornament and on his hat. I finished off the card with sentiments from Holiday Trimmings and Holiday Boughs.

I hope you've enjoyed this fresh look at these oldie but goodies.

Tuesday, May 9, 2017

Vibrant Modern Peonies with Joni

Hello everyone, Joni here sharing my take on the new Modern Peonies stamp set and companion die. Don't you just love these flower set? You don't have to double up the flower images to make a statement. They are big enough for an A2 card.

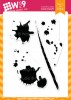
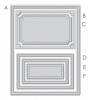
To begin my card, I first distressed it with Tim Holtz Distress Ink in Cracked Pistachio and Twisted Citron. I then added a few "ink splatters" using the Ink Splats stamp set for added interest in the background. I die-cut the entire panel with the the large stitched rectangle from the Gift Card Layers Die for a decorative edge.

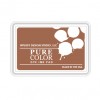
Next, I stamped the flowers with PURE COLOR Dye Ink in Coconut Husk, then colored them with Copic Markers - (Flowers: R00,R20, R08) (Center: Y35, E33, E25, BG10) (Leaves: YG00, G000, YG13).

I splattered the background with white gouache paint and adhered the flowers with foam tap. Next, I stamped the sentiment using the same Coconut Husk ink, and added a few sequins from the Pretty Pink Posh Sparkling Clear Confetti Mix to finish off the card.

Thank you so much for stopping by!

Featured Supplies

For your convenience, here is a list of the featured Wplus9 supplies used on today's project(s), along with links to purchase. Please note: this list may contain some affiliate links.

Friday, February 24, 2017

Soft & Subtle Happy Wishes with Joni

Hello Everyone, Joni here sharing an inspiration using Doodle Buds stamp set and companion die set. This card has reminded me how versatile the entire set is. For today's project I decided to go with a more neutral color scheme.

For this project I also used Happy Wishes Words die for sentiment. The vellum leaves were die-cut from Under the Mistletoe die set and also used the large frame from Gift Card Layers die set.

To begin, I first die-cut my card base on a Kraft cardstock using the Gift Card Layers Die. Then cut a white card base a little smaller than an A2 card. The "Happy Wishes" sentiment was die-cut in white then colored with Copic markers.

Next, the flower images where stamped with Coconut Husk die ink and then colored with Copic markers. Then, then die-cut the flowers with its coordinating dies and adhered with foam tape.

Thank you so much for stopping by!

Featured Supplies

For your convenience, here is a list of featured supplies (or equivalents) used on today's project(s), along with links to purchase. Please note: this list does contain some affiliate links.

Connect with us:

Follow Us on Pinterest