Showing posts with label Shaker Cards. Show all posts

Saturday, May 26, 2018

Oh My Gostrich!

Hello Crafty Friends!

Today I wanted to share another new set with you from our May 2018 Release. This is such a fun set, Stephany Zerbe did a fantastic job illustrating it! Again, I created several cards with this one, but I have two to share with you today.

I decided to create a fun shaker card first. I wanted to create a little party of ostriches. Or is the plural of ostrich, ostrich? One sec, BRB.

Well, thank you google. Apparently either is correct. I think I'm gonna go with "ostrich". Just sounds better to me.

So, for this Ostrich Party, I started by stamping the image of the two ostrich several time on my panel. I then masked them off and stamped the background in Queen Bee PURE COLOR dye ink using the Big Top Background stamp. I colored my guys and there accessories with Copic Markers.

For the shaker frame, I used our 4 Bar Stitched Rectangles die to cut a window. I stamped and heat embossed "birthday" onto the acetate window using the new Birthday Wishes stamp set.

I piled all of my little sequins and bits inside and then adhered everything together. I think this is a fun little party-in-a-card that is perfect for boys and girls of all ages!

Next up, I wanted to create something appropriate for those men in our lives over 21. This could easily be created for a woman as well, but I usually have a difficult time with masculine cards, so I thought this was a perfect set to explore some of those options without defaulting to the "typical" guy themes.

I stamped the ostrich and colored them with Copic Markers. Then I used the companion die to cut out the circle and heads. The die for this is perfect and cuts a negative circle out and around them. Again, perfect for a shaker card. But instead, for this one, I used the confetti image from our new And Many More! stamp set to stamp the confetti on the background panel. I also used the same set to stamp the circular sentiment around the window opening. The full sentiment reads "Happy Birthday To You! Happy Birthday To You! Happy Birthday Dear Friend! Happy Birthday To You! And Many More!"

I finished these guys off with a few accessories and a banner and sentiment, all included in Oh My Gostrich!.

Hope you enjoyed! I do have a few others to share with you, but I'll have videos of those. I just need to voice them over. In addition to our May Release, I just turned the big 4-Oh and my husband's birthday was yesterday. Add in Mother's Day as well, I've been stealing time where ever I can! LOL So, if you are not yet subscribed to our YouTube Channel, be sure to head over there and subscribe. That will be up in the next couple of days.

Thanks for stopping by and I hope you are having a wonderful weekend and Memorial Day Weekend for those in the states!

Featured Supplies

For your convenience, here is a list of the featured supplies used on today's project(s), along with links to purchase. Please note: this list contains affiliate links.

Wplus9 White Cardstock
Shop at:
WP9
Wplus9 4 Bar Stitched Rectangles Die
Shop at:
WP9
Wplus9 PURE COLOR Black Dye Ink
Shop at:
WP9
Tsukineko Versamark EMBOSS INK PAD
Shop at:
SSS | EH
Precision Heat Embossing Tool Gun Hero Arts
Shop at:
SSS
3M Scotch DOUBLE-SIDED FOAM TAPE
Shop at:
SSS
Ranger Multi-Medium Matte
Shop at:
SSS
Sizzix BIG SHOT
Sizzix BIG SHOT
Shop at:
SSS
MINI MISTI PRECISION STAMPER Stamping Tool Kit
Shop at:
SSS | EH
Wplus9 Queen Bee Dye Ink
Shop at:
WP9
Bo Peep PURE COLOR Dye Ink
Shop at:
WP9
EK Success CUTTER BEE Scissors
Shop at:
SSS
Neenah Classic Crest 80 LB SMOOTH SOLAR WHITE Paper Pack 25 Sheets
Shop at:
SSS
Memento TUXEDO BLACK INK PAD Full Size
Shop at:
SSS
Sizzix Magnetic Platform
Shop at:
SSS
Inkadinkado EMBOSSING MAGIC Powder Bag
Shop at:
SSS
Hero Arts WHITE EMBOSSING POWDER
Shop at:
SSS
Inkadinkado STAMPING MASK PAPER
Shop at:
SSS
Oh My Gostrich!
Oh My Gostrich!
Shop at:
WP9
Oh My Gostrich! Die
Oh My Gostrich! Die
Shop at:
WP9
And Many More!
And Many More!
Shop at:
WP9
Birthday Wishes
Birthday Wishes
Shop at:
WP9
Big Top Background
Big Top Background
Shop at:
WP9

Wednesday, April 19, 2017

GUEST ARTIST FEATURE: Debby Hughes

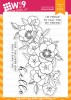
Hi this is Debby and I'm delighted to be guesting for Wplus9 today. As soon as I saw the Kind Soul set I knew I wanted to use it as I love the delicate anemones and petunias, which have already been collected in to a beautiful arrangement for me.

I know this one is hard to get your hands on at the moment, but it was in stock when I created this video, I promise! There is a fresh batch on reorder and you can sign up to be notified when it arrives on the product page at wplus9.com

I decided to make an elegant watercoloured shaker card.

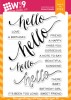
I white heat embossed the flower image onto watercolour paper and watercoloured. I then cut a circle opening in a panel of Simon Says Stamp Fog cardstock, (Wplus9 Dove Grey would work beautifully as well) and adhered behind it heat resistant acetate on which I'd heat embossed "hello" from the Hand Lettered Hello set.

I've put together a quick video to share my process with you.


Watch above or watch in HD at YouTube

To unify the main design element and add even more depth, I also white heat embossed and painted a few extra flowers to go on the front of the card.

To finish the sentiment I stamped one of the coordinating phrases from Hand Lettered Hello onto Coal Mine cardstock, white heat embossed it and trimmed to a skinny banner. Finally I added a few sequins and then mounted the finished panel on to a white, side folding card base.

Thank you for joining me today and thanks to Wplus9 for inviting me to guest.

Featured Supplies

For your convenience, here is a list of the featured Wplus9 supplies used on today's project(s), along with links to purchase.

Additional Supplies

  • Paper - Arches Cold Pressed Watercolour, Simon Says Stamp Fog, Slate, Neenah Solar White 110lb, Hot Off The Press Heat Resistant Acetate
  • Inks - Simon Says Stamp clear embossing ink
  • Embossing Powder - Simon Says Stamp white
  • Color media - Watercolours (mainly Daniel Smith)
  • Brushes - Winsor & Newton series 7
  • Sequins - Little Things By Lucy's Cards Just Peachy, Vintage Lilac
  • Other - Misti, Ranger Multi Medium Matte, Big Shot, 3M foam adhesive, EK Success powder tool, heat gun, glue runner

Friday, December 23, 2016

GUEST ARTIST FEATURE: Sharna Waksmulski

Hello everyone, Sharna here, so excited to be guest designing for Wplus9 today! I have three cards to share with you featuring the new Friends for all Seasons: Winter stamp set & a few others from this release and last.

For today's cards I decided to make shakers. I love the extra touch of an interactive card. Shakers can seem difficult but I promise they aren't! I have gotten into the habit of making several cards all at once while I have all my supplies out. It is really easy to switch up the colors and sentiments to make each one unique but not really take much more time than the single card would be.

For my backgrounds, I chose a bunch of distress inks & dye inks in a few of my favorite colors. I used a foam ink blending tool and watercolor paper. My tip for blending is to hold the base of the blending tool instead of the handle and start off the paper. I keep scratch paper under my cardstock so that absorbs some of the ink before I bring it onto the paper.

For the frame of the shaker portion of the card I used the Sunshine Layer Dies. I nested the inner rounded edge die inside of the outer scalloped edge die, taped them together with washi tape and ran them through my die cut machine. I applied a piece of acetate cut slightly smaller than the frame with some tape runner to the back side of each frame. Then I doubled up some foam tape before cutting in half lengthwise so it was thin enough to hide behind each frame (shown in step 1 in the image below). Running some powder tool around the edges keeps the sequins from sticking to any of the foam tape (see step 2).

Since my background is larger than my window frame I put the sequins in the middle in a pile taking care to keep them from the edges where the foam tape will go (see step 3). I then lined up my frame and set it down over the sequins (step 4).

I really hope you enjoyed my shaker cards!

Featured Supplies

For your convenience, here is a list of the supplies (or equivalents) used on today's project(s), along with links to purchase. Please note: this list does contain some affiliate links.

Connect with us:

Follow Us on Pinterest