Hello everyone! This is Yana Smakula and for today’s blog post and video I pulled out a few stamp sets and combined them on a card to create a festive Holiday scene.

Lately I’ve been enjoying using images from different stamp sets and creating various patterns/scenes, so I thought it would be fun to play with a few Holiday sets and share some of my tips for mixing and matching images.
I knew I wanted to have several birds from the All Year Cheer stamp set sitting on the front of my card and singing Holiday Cheer. So I started looking for ways I could create a fun and natural-looking background for them.
Watch my video tutorial below to see cardmaking process from start to finish and pick up a few other tips:
Watch above or watch in HD at YouTube

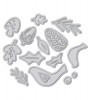
I started by stamping several branches from the same All Year Cheer set in Coconut Husk dye ink. This is a nice brown color that works great for stamping woodgrain patterns or wood-like images. I rotated the branch image and ended up having some branches facing down and some facing up. If you’d like to have more branch variety on your project you can manipulate the stamp slightly and curve it a bit to have the branch bow some more or become flatter.

I also used two circle images from the All Year Cheer set and stamped ornament-like circles in Cranberry Crush and Gala Red ink colors.
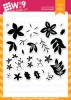
I knew I wanted to add some holly leaves to complete my branches, but there weren’t any suitable leaves in the All Year Cheer set so that’s when I started looking for images in my other stamp sets. The Be Merry Florals set seemed like a perfect fit, so I used two leaves and also a berry branch and stamped them in Last Leaf and Cranberry Crush.

Whenever I combine stamps from two or more stamp set I always try to follow these simple rules:
- I try to make sure the style of the imagery I use is the same. For example, if I am using outline images from one set, I will look for outline images in other sets to compliment my stamping. If I am using solid images, like I am doing here, my birds are all solid, my branch is solid, my ornaments are solid and so I look for solid leaves. I do sometimes mix solid and outline images on one pattern, but not very often.
- I also look at the scale of my images. For example, I want my leaves, my branches and my ornaments to look proportional to my birds. I don't want to have giant birds and tiny leaves and vice versa.
Thanks for joining me today! Have fun stamping!

Featured Supplies
For your convenience, here is a list of the supplies (or equivalents) used on today's project(s), along with links to purchase. Please note: this list does contain some affiliate links.
 Wplus9 All Year Cheer Clear Stamps
Shop at:
WP9
Wplus9 All Year Cheer Clear Stamps
Shop at:
WP9 |
 Wplus9 All Year Cheer Designer Dies
Shop at:
WP9
Wplus9 All Year Cheer Designer Dies
Shop at:
WP9 |
 Wplus9 Be Merry Florals Clear Stamps
Shop at:
WP9
Wplus9 Be Merry Florals Clear Stamps
Shop at:
WP9 |
 WPlus9 Strictly Sentiments 6 Clear Stamps
Shop at:
WP9
WPlus9 Strictly Sentiments 6 Clear Stamps
Shop at:
WP9 |
 WPlus9 Coconut Husk Dye Ink
Shop at:
WP9
WPlus9 Coconut Husk Dye Ink
Shop at:
WP9 |
 WPlus9 Last Leaf Dye Ink
Shop at:
WP9
WPlus9 Last Leaf Dye Ink
Shop at:
WP9 |
 WPlus9 Cranberry Crush Dye Ink
Shop at:
WP9
WPlus9 Cranberry Crush Dye Ink
Shop at:
WP9 |
 WPlus9 Gala Red Dye Ink
Shop at:
WP9
WPlus9 Gala Red Dye Ink
Shop at:
WP9 |
 WPlus9 Fairy Dust Dye Ink
Shop at:
WP9
WPlus9 Fairy Dust Dye Ink
Shop at:
WP9 |
 WPlus9 Silver Lining Dye Ink
Shop at:
WP9
WPlus9 Silver Lining Dye Ink
Shop at:
WP9 |
 Neenah 80 Solar White Paper Pack 250 Sheets
Shop at:
SSS | AZ
Neenah 80 Solar White Paper Pack 250 Sheets
Shop at:
SSS | AZ |
 Spellbinders - Platinum 6 - Die Cutting and Embossing Machine
Shop at:
SC | AZ
Spellbinders - Platinum 6 - Die Cutting and Embossing Machine
Shop at:
SC | AZ |
 Mini MISTI Stamping Tool
Shop at:
SSS | SC | AZ
Mini MISTI Stamping Tool
Shop at:
SSS | SC | AZ |
 Scrapbook Adhesives White Foam Squares
Shop at:
SSS | AZ
Scrapbook Adhesives White Foam Squares
Shop at:
SSS | AZ |
 Ranger Glossy Accents Glue Dimensional Adhesive
Shop at:
SSS | SC | PPP | AZ
Ranger Glossy Accents Glue Dimensional Adhesive
Shop at:
SSS | SC | PPP | AZ |
 3L Scrapbook Adhesives - EZ Runner Grand - Permanent
Shop at:
SC | AZ
3L Scrapbook Adhesives - EZ Runner Grand - Permanent
Shop at:
SC | AZ |
 3L Scrapbook Adhesives - EZ Runner Grand - Permanent - Refill
Shop at:
SC | AZ
3L Scrapbook Adhesives - EZ Runner Grand - Permanent - Refill
Shop at:
SC | AZ |
 Ranger Stickles Star Dust Glitter Glue
Shop at:
SSS | SC | AZ
Ranger Stickles Star Dust Glitter Glue
Shop at:
SSS | SC | AZ |