Showing posts with label Bold Banner die. Show all posts

Monday, July 24, 2017

Easy Window Card with Kara

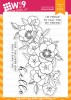
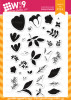
Hey Guys! It's Kara and I'm here with another project to share featuring the new Southern Summer Florals 1. I've been spending a lot of time outdoors and my hydrangea bush is full of beautiful blue blooms. I decided to bring in those blue shades with this new floral set. Lake House and Nautical Navy are my favorite combination!

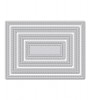
I started by die cutting a piece of white cardstock with the 4 Bar Stitched Rectangle Die. In the center of that I positioned the large oval from the Basic Labels Die to create a window. I created three clusters of flowers and leaves around the oval window placing some in front and some behind the opening. The clusters include the blue flowers I stamped earlier as well a few accent flowers stamped in Hayride ink and leaves stamped in Mojito and Appletini.

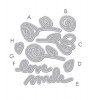
I die cut a banner using the Bold Banner Die to span the width of the oval window. Since the left side of the banner would be tucked into the floral cluster, I stamped my sentiment closer to the right end of the banner. I had blue hydrangea in my wedding bouquet so obviously this has got me thinking about love! I chose the Mr.&Mrs. stamps from the Bold Banner Greetings set as my main sentiment.

I placed the die cut embellished window on top of another panel of white cardstock that had been die cut with a stitched rectangle die. Then both of those layers were adhered to a white card base. Between each layer I used dimensional adhesive. When using so much white I like to add texture and dimension for interest. As a final touch I added the die cut 'love' from Flower Doodles Die!. I love the shadows this creates.

Thanks so much for stopping by today!

Featured Supplies

For your convenience, here is a list of the featured Wplus9 supplies used on today's project(s), along with links to purchase.
Thursday, June 22, 2017

Best Friend Ever With Kara

It's officially summer here in the US and I couldn't be happier! I had to pull out my Friends for All Seasons: Summer set to celebrate. I love making cards to send to friends 'Just Because' and this sentiment is perfect for that.

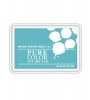
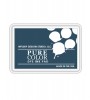
I started by using the three speech bubble stamps in the set to create a diagonal background. I drew one diagonal pencil line from corner to corner to get my pattern started. I stamped the speech bubbles alternating between Lake House, Nautical Navy, and Black PURE COLOR Dye Ink. I stamped and die cut about ten little bones to fill in the empty speech bubbles. I adhered them with dimensional adhesive and trimmed them anywhere they hung over the edge of the stamped panel.

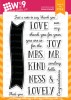
I used the large Bold Banner Die to anchor my sentiment and main focal image. With such a busy background I love to leave stamped lined images uncolored. All that blue in the design needed a little pop of red. A die cut and Copic colored (R29) heart does the trick!

Now I just need a few more and I'm all set! Thanks so much for stopping by. See you again soon for July Release Week!

Featured Supplies

For your convenience, here is a list of the featured Wplus9 supplies used on today's project(s), along with links to purchase.
Friday, April 21, 2017

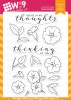
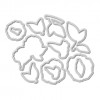
No-Line Watercoloring Modern Petunias with Dawn

Hello everyone! Today I wanted to share a couple of cards with you featuring our Modern Petunias stamps and dies. This set was definitely one of my favorites from our last release. It is so much fun to watercolor! Whether you are going for more detailed realistic watercoloring or a washy loose look, the images are perfect.

For my cards, I just stamped a bunch of the images from the set onto Fabriano Artistico hot pressed watercolor paper using Antique Linen Tim Holtz Distress Ink and started painting.

I used traditional watercolors as they are what I am most comfortable with, but you could also achieve similar looks with other watercolor mediums you may have on hand. I used the same technique as I shared in a video in this post using the Kind Soul stamp set.

Once I had all of my elements painted and they were dry, I die cut them and arranged them with a banner die cut using the Bold Banner Die.

I still had a bunch of flowers left over, so I decided to create another card.

This time I decided to create a wreath to encase my greeting.

I masked off the word "friend" in my sentiment from Kind Soul before stamping. Then I filled in the rest of the sentiment using the Simon Says Stamp Pained Friend Die that I heat embossed in gold. I stacked a few of the die cuts on top of each other to give it a little heft and dimension.

And, you know I love me some florals and stripes...so I used the Simon Says Stamp Wide Stripes Background cling stamp to add some bold black stripes in the background.

Speaking of Simon Says Stamp, I am super excited to be getting ready to head out to teach watercolor stamping at Simon Says Create!

Although the class portion is sold out, did you know that there will also be a Pop-Up Shop as well? Yep that means you can still participate in some of the fun. In addition to the store, there are 24 sponsors participating in CREATE IT, TAKE IT activities and Tim Holtz will be doing live demos! If you are in the area, or would like to know more, you can find additional information here. I hope to see you there!

Featured Supplies

For your convenience, here is a list of the featured supplies used on today's project(s), along with links to purchase. Please note: this list may contain some affiliate links.
Connect with us:

Follow Us on Pinterest