
Hello everyone! This is Natalia Valkovskaya and I’m so happy to see you all again! Happy Valentine’s Day! Let it be filled with happy giggles, sweet surprises, the smell of coffee (or herbal tea), and taste chocolaty!
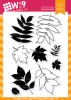
Today, I’ll share with you two cards featuring my all time favorite set Autumn Leaves and spotlight diecutting technique - which is easy, yet always eye-catching!

Watch above or watch in HD at YouTube
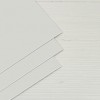
First, I die-cut two panels out of watercolor cardstock cut to 5 x 4.25" each and heat embossed one of the leaf images form the Autumn Leaves stamp set in clear and gold. Then I used the wet-on-dry method (damp brush on dry cardstock) to apply Mustard Seed, Twisted Citron, and Cracked Pistachio distress inks onto the panel with a watercolor brush. Once it was dry, I spritzed it with water for this gorgeous droplets look.

Once the panel was completely dry, I heat embossed the sentiment from Quite Like You in gold and added a golden edge to the panel. It’s very easy to do but it looks quite striking and gives the card this extra something-something. You just swipe each of the four edges of the panel across you Versamark inkpad, then sprinkle embossing powder on the ink. If you are not happy with how the edge looks (e.g. uneven or too broad), you can easily fix it by knocking off any unwanted powder with a dry brush before heat setting.

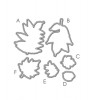
In the end, I die-cut the golden leaf with the Autumn Leaves Companion Die, adhered the negative panel to the card base, and then adhered the die cut leaf a bit off-set for additional interest using foam tape, and that’s it! The first card is finished!

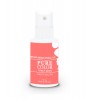
The second card has a more "artsy" look. To achieve this I used the ink-smooshing technique. Sweet Nectar Spray Mist, with its yummy luscious corally color was just perfect for this! I spritzed it onto a laminated sheet, added some water for a softer look, and transferred it to the panel with a piece of acetate, making sure that my heat embossed leaf is nicely covered with ink. I added some splatters for more interest, let it dry and then ironed off the heat embossing.

Then I stamped the same sentiment as on the first card, but this time in Black PURE Color Dye Ink and right across the centre of the leaf. After that, I die-cut the leaf just like I did the first time. I also die-cut five more leaves from black cardstock and adhered them together to create a chipboard effect.

Before adhering the negative panel onto the Dove Grey card base, I added black splatters. They always look good on these kind of cards. Well, on many kinds of cards if you ask me. Finally, I put my puzzle piece into the place and voila, one more card ready!

That’s all from me for today. I hope I could inspire you to take your favorite stamp set and get creative! As always, be safe, and happy crafting!
~Natalia
Featured Supplies
For your convenience, here is a list of featured supplies (or equivalents) used on today's project(s), along with links to purchase. Please note: this list does contain some affiliate links.


Классные открыточки!)
ReplyDeleteСпасибо большое, Лена! Очень рада, что вам понравилось :)
DeleteAbsolutely beautiful!
ReplyDeleteThank you so much, Teresa! ❤
DeleteStunning!! I love both cards.
ReplyDeleteThank you! So glad you like them! :)
DeleteThis is a wonderful technique and your cards are beautiful! Thanks so much for sharing and for your video!!!
ReplyDeleteOh, Maureen! Thank you so so much for your kind words! They really mean a lot to me!
DeleteBoth cards are gorgeous!!!! I'm sure the video is awesome,going to watch it now:)
ReplyDeleteLoved the video and acetate tip ! Thank you!!!!
ReplyDeleteI love this technique...fast to make several but they have so much dimension and happiness! Thank you.
ReplyDeleteGreat technique, and I love the look you achieved on each card! Thanks also for the video tutorial. I'll definitely have to try this. :) ~ Andrea
ReplyDelete