Thursday, September 14, 2017

Bunny Mask-erade With Kara

Hello Guys! So, summer is drawing to a close, school has started and I'm turning my attention toward fall. When I think of fall I think cool cozy nights, falling leaves and, of course, Halloween!

This adorable set, Bunny Mask-erade, was released this time last year. I was in the process of moving into our new house and I never had a chance to play around with it. I thought this was the perfect time to pull it out and ink it up for the first time!

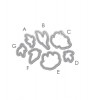
As always with a new set, I start by die cutting a ton of pieces. I always make a mistake or two, trying different things to see what I like, so I really appreciate taking the time to die cut ahead of time and not have to keep getting up and die cutting more.

I started coloring in these cute little masks. I wanted the masks to stand out against the little bunnies so I left them quite simple with just a swipe of a light gray T1 Copic Marker. This also keeps the coloring to a minimum. Since this is an invitation, mass production was a consideration. Keeping the coloring simple will make the process much quicker. I attached the masks to the bunnies with some foam adhesive. I then& colored the accessories with Copics and also added a some shimmer with a clear Wink Of Stella brush pen.

The background is created simply by sponging on some Distress Inks. A little green at the bottom to create grass, a little blue at the top for the sky. I kept the background technique simple, again for ease in mass production.

Thank you so much for stopping by today!

Featured Supplies

For your convenience, here is a list of the featured Wplus9 supplies used on today's project(s), along with links to purchase.


Monday, September 11, 2017

Dream Big Indigo Pencil Colored Leaves Background Card with Yana

Hello friends! This is Yana and I hope you are having a fabulous week!

I am back to sharing unique diy patterns you can create using your stamps. This time I was inspired by an image that I spotted on Pinterest and decided to try coloring one of the leaves from the Autumn Leaves set in gorgeous blues.

Even though these leaves are meant for Fall, by changing up the colors you can use them to create a dramatic background such as the one I am sharing today.

I started working on my card by stamping one of the leaves repeatedly (in a random fashion) onto a black cardstock panel. I first prepped my panel using an anti static powder tool and stamped images using embossing ink.

I made sure to overlap leaves a bit, but not too much. After covering the entire panel with gold embossing powder I used a small dry brush and removed powder where I had the leaves intersect making it look like some were on top of the others. I learned this easy technique from my friend Svitlana - she has a video tutorial showing how this is done. This eliminates the need to do masking when creating a background like this and makes stamping process go a lot faster.

Next I pulled out my Faber-Castell Polychromos Pencils and colored in my leaves using Dark Indigo and Cobalt Turquoise. Coloring took a bit of time - I first added a darker Dark Indigo color at the base of the leaves, colored tips using Cobalt Turquoise and to blend the two together went over ⅔ of the leaves with the Dark Indigo. You can also use Prismacolor Pencils for this technique.

Once my coloring was done I trimmed this panel to 4 x 5 ¼” and foam mounted onto an A2 side folding card base. I added a simple “Dream Big” sentiment on top and embellished this card using clear dots created using Nuvo drops in Morning Dew.

Have fun stamping!

Featured Supplies

For your convenience, here is a list of the featured supplies used on today's project(s), along with links to purchase. Please note: this list contains affiliate links.

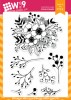
Wplus9 Autumn Leaves Clear Stamps
Shop at: WP9
WPlus9 Stardust Stamp Set
Shop at: WP9
WPlus9 Black Cardstock
Shop at: WP9
Hero Arts Gold Embossing Powder PW100
Shop at: SSS | SC | HA | AZ
Simon Says Stamp Antique Gold Embossing Powder
Shop at: SSS
Faber-Castell Polychromos Colored Pencils
Shop at: SSS
Faber-Castell Polychromos 36 Pencil Studio Set
Shop at: AZ
Neenah 110 Lb Solar White Cardstock
Shop at: SSS | AZ
Hero Arts Heat Embossing Gun PW200
Shop at: SSS | SC | HA | AZ
ScraPerfect Crafting Pouch
Shop at: SSS | AZ
Versamark Watermark Emboss Ink Pad
Shop at: SSS | HA | AZ
Tonic Morning Dew Nuvo Crystal Drops
Shop at: SSS | SC | AZ
Scrapbook Adhesives Black Foam Tape
Shop at: SSS | AZ
Scor-tape 2 1/2 Inch Crafting Tape
Shop at: SSS
White Fun Foam 12 Pack 9 x 12
Shop at: SSS | AZ

Thursday, September 7, 2017

Vintage Bouquet with Joni

Hello everyone. Joni here sharing with an oldie but goodie stamp set Beautiful Bouquet: Dahlia. For my project I tried to create something with more of a vintage feel. It's really easy to achieve using the Prima Metallic Accents Watercolor Cake.

To begin I first stamped the image on watercolor paper and colored it with Prima Metallic Accents Watercolor Cake. I let it dry and then added a few splatters. I then adhered it to a card base.

For the sentiment I used the stamp set from Modern Anemones and Beautiful Bouquet: Daliah. This is a really simple watercolor project if you need something fast and just want to play around with different colors or experiment with a new watercolor palette.

I added some Pretty Pink Posh Sparkling Clear Sequins to finish off the card.

I hope you enjoyed! Until next time!

Monday, September 4, 2017

You're The Best With Kara

Hey Guys! Kara here with a sweet little fox card to let you know you're the best! You always leave the nicest comments and I really appreciate it!

I have mixed together so many sets on this one project and I love it! I started with the Watercolored Anemones set. I die cut a bunch of flowers and leaves and stamped them all out. I started to arrange the flowers and leaves on a piece of white cardstock to see what I liked. I felt that behind the die cuts I needed something stamped in the background. I wanted something without too much visual weight because the die cut flowers in the front were quite heavy. I used a very thin lined image from Botanical Bunch. I chose to stamp it twice in Cranberry Crush ink, the darkest color in the flowers but stamped in the least amount. This helps to balance the colors. I decided to add in the cute fox and because his eyes and nose were black I wanted to add in more black to the design. A few berries from Botanical Bunch and some dots from Dream Believer add just the right amount.

I wanted to extend the size of the background stamping a bit, but in a more subtle color. I chose to use the lightest color from the flowers, Shell Pink. I used an image from Ink Splats for this.

Underneath I added a black panel and accented two corners with just a few elements of the main design. A banner tucked into the floral spray with a simple sentiment finishes it off.

I hope you like it. Thanks again for stopping by. You're the best!

Featured Supplies

For your convenience, here is a list of the featured Wplus9 supplies used on today's project(s), along with links to purchase.
Saturday, September 2, 2017

BLOG HOP: The 30 Day Color Challenge

Welcome to Day 2 of The Daily Marker 30 Day Coloring Challenge Blog Hop. Kathy Racoosin from The Daily Marker wants to share her love of coloring with you. Today Kathy has assembled a blog hop to give your creativity a jump start with some of the stops that will be on The Coloring Challenge Road Trip & her favorite OnLine Card Classes.

The premise of The Daily Marker 30 Day Coloring Challenge is to color something every day, even if it’s just for five minutes - however feel free to jump in or out as time permits - and any coloring medium is welcomed. It’s been proven that coloring can lower your blood pressure & make you feel happy and relaxed so it’s worth carving out a little time for yourself each day. You will find that Kathy encourages you along the way to stretch your creativity a little bit more and to feel successful with your coloring.

Click here to check out Day 1 and get all of the details on ways to participate, share your work and be inspired by all of those participating.

And if you have any questions about The Daily Marker 30 Day Coloring Challenge you can refer to this post.

Blog Hop

You should have arrived here from the always fun Lawn Fawn.

For this round of the 30 Day Color Challenge, I am challenging myself to do a series of floral studies. The goal is to do a different flower each day in varying mediums. Some may span several days and some may be very quick, depending on how in depth I decide to get with each one. I decided to start with traditional roses.
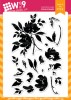
I thought I would give you all a kind of behind-the-scenes look at my process. Most of our stamps start with hand illustrated sketches, so I turned on the camera and thought I'd share some of it with you guys - from simple sketch to full shading. I hope you enjoy!


Watch above or watch in HD at YouTube

The next stop on the hop is the one and only Debby Hughes!

Giveaway

So, will you be participating in The 30 Day Color Challenge? Let me know in the comments below by 11:59 p.m. EDT on Friday, September 8, 2017. I will select one random winner who will win a $50 store credit to wplus9.com. Perfect to use on our upcoming September 2017 Release coming later this month!

You will find lots of generous giveaways along the hop. The full list of ALL winners from the individual blogs will be announced on Kathy's blog on Tuesday September 12th. (check each blog for the specifics of their giveaway)

Connect with us:

Follow Us on Pinterest