
Hello Guys! So, summer is drawing to a close, school has started and I'm turning my attention toward fall. When I think of fall I think cool cozy nights, falling leaves and, of course, Halloween!

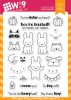
This adorable set, Bunny Mask-erade, was released this time last year. I was in the process of moving into our new house and I never had a chance to play around with it. I thought this was the perfect time to pull it out and ink it up for the first time!

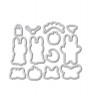
As always with a new set, I start by die cutting a ton of pieces. I always make a mistake or two, trying different things to see what I like, so I really appreciate taking the time to die cut ahead of time and not have to keep getting up and die cutting more.
I started coloring in these cute little masks. I wanted the masks to stand out against the little bunnies so I left them quite simple with just a swipe of a light gray T1 Copic Marker. This also keeps the coloring to a minimum. Since this is an invitation, mass production was a consideration. Keeping the coloring simple will make the process much quicker. I attached the masks to the bunnies with some foam adhesive. I then& colored the accessories with Copics and also added a some shimmer with a clear Wink Of Stella brush pen.

The background is created simply by sponging on some Distress Inks. A little green at the bottom to create grass, a little blue at the top for the sky. I kept the background technique simple, again for ease in mass production.
Thank you so much for stopping by today!

Featured Supplies
For your convenience, here is a list of the featured Wplus9 supplies used on today's project(s), along with links to purchase.


The ink blending in bus so smooth!! Loved the cute card :)
ReplyDeleteCute card, love the little masks for the bunny!
ReplyDeleteOh my goodness, Kara! Can you believe how quickly that first year has gone? I know you're probably way ahead of me in the 'settled' department!
ReplyDeleteYou've made us look at this one-year-old set with fresh eyes, my friend... and I LOve what I see! So cute!!!
=]
So adorable!!
ReplyDeleteThat is so adorable!
ReplyDelete