Hey Guys! It's Kara and today is the first day of my Spring Break! When I'm not crafting, I'm an American Sign Language interpreter for a deaf student in high school. I love it, but Spring Break? Yes, please! In honor of spring, I have a glittery rainbow to share with you.

Double sided adhesive is a wonderful thing, especially when it comes to using glitter. The most common complaint that I hear about using glitter is related to the mess. When you use double sided adhesive it really cuts down on the mess. The glitter sticks instantly, unlike with liquid glues.
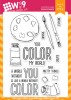
I'd love to paint with this glittery rainbow!

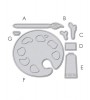
Start by prepping the palette for the glitter. Apply double sided adhesive to a piece of white card stock, leaving the release paper in place on the exposed side. Position the Artist Palette Die on top of the cardstock with the release paper side up. Run it through your die cutting machine. My machine cuts the perimeter of the die on the first pass, but not all the way through the individual wells of color, which is perfect for this. Now it's time to add the glitter, and we'll do this is stages:
- Remove the release paper from one of the individual blobs of paint and add a little sprinkle of glitter. Press the glitter into the adhesive, shake off the excess. I always do this on a piece of copy paper for easy clean up. Repeat for the remaining colors, working one at a time to keep the glitter colors separate.
- Carefully remove the rest of the release paper from the palette. I find that peeling from the end opposite the thumb hole prevents stray glitter from attaching itself to the palette.
- Add your background glitter. In this case, I wanted white, but you could use any color you like.
I did the same for the paintbrush, carefully peeling back the release paper to reveal specific portions to add glitter by desired color.

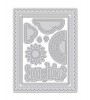
I added a simple white heat embossed sentiment using the Color My World stamp set. I enhanced the word 'color' with a copic marker that was a shade darker than the Ballet Slippers cardstock card front. A little added detail comes from the Sunshine Layers Die. I've layered the card front up with a piece of vellum and black cardstock cut with the same die.
I hope you've enjoyed! Thanks so much for coming by today.