Hello, and welcome back to our Holiday 2014 Release! We are right in the middle of previewing all of our newest products that will be available starting October 5, 2014 at wplus.com as well as at many of your favorite retailers.
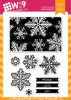
Let's face it, Holiday card making is all about mass production. Sure, we make some originals for those recipients who we know will hold on to their cards for a while. But for the bulk of cards, we usually pick one or two designs and create them in mass. So today, I'm sharing some great candidates featuring the new Snowflake Backdrops set.

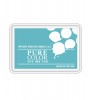
The reverse background included in Snowflake Backdrops makes creating a quick card a snap. I started by stamping it in Silver Lining PURE COLOR Dye Ink on to White Cardstock.
To give it that "WOW!" factor, I pressed a Versamark pad directly on to the image, covered it with clear glitter embossing powder and heat embossed it.

I added a quick stag die cut using the new Stag Trio Die and a sentiment from Winter Woodland and called it done.
And here is another version.

This time I stamped it in Lake House PURE COLOR Dye Ink and added a snowflake using the Snowflake Trio Die.
I just love how from one angle it looks like frosted glass.

And then when the light hits it...that iridescent shimmer is amazing!

You could simplify these even more by leaving off the die cuts. The effect in real life is so impactful that it can really stand on it's own. If you do add the die cuts on top, you'll want to use a strong adhesive that will adhere to the glittered embossing. I used Teariffic Tape on the the stag and Glossy Accents for the snowflake. Both held up well.
This next one appears much more intricate than it really is.

I started by heat embossing the haloed snowflake images in white on to White Cardstock. I rubbed Distress Ink in Broken China over the snowflakes using a blender tool. I concentrated the ink around the flakes and faded it out around the edges.
Get ready for the fun part...

Check out that shine! I then misted it with a clear shine mist spray that I am currently testing. I am really impressed with the samples so far. Hmm...what do you think? You like?

I finished it off with a simple gold embossed sentiment using Heartfelt Holiday, a little thread and a few sequins.
Glittery not your style? How about a little eclectic number in a fun color palette?

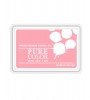
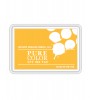
Simple and fun. I stamped a few of the snowflakes in Flamingo and Wild Mango PURE Color Dye Ink. I layered a stag head using the Stag Trio Die and added the sentiment from Snowflake Backdrops.
I've got one more to show you today. Another easy card perfect for mass production.

I started by stamping the haloed snowflakes in White Pigment Ink onto a Dove Grey cardstock panel trimmed down to 3 3/4 x 5". Since this I used pigment ink, I gave it a little time to dry and then added the stitched lines around the edges using the Holiday Aperatures Die.

I added the sentiment from Snowflake Backdrops and adhered the panel to a Dove Grey card base using foam tape. Another classic and elegant design that is quick and easy to execute.
That's it from me for today, but the Design Team has more to share with you as well.
More Design Team Inspiration
Giveaway Alert
Would you like to win the Snowflake Backdrops stamp set and the Snowflake Trio Die before you can buy them? Just leave a comment below by 10:00 a.m. EST on 10/04/14 to enter. I will select one random winner from all comments. Winner will be posted on our Releaser Winners page by noon.
Good luck! And as always, thank you so much for stopping by and I hope to see you again tomorrow for even more previews!