Showing posts with label Smart Kitty. Show all posts

Monday, May 14, 2018

Congrats Grad With Kara ft. The Crew: School Days

Hi! It's Kara and it's that time of year again! The school year is winding down and kids are graduating. The student I have interpreted for over the past 9 years is graduating this year! I am so proud of her, but I'm sad to say goodbye.

I created this card with a mix of elements from Smart Kitty and The Crew: School Days. I started by stamping the one stack of books in the center. I then masked it off and started stamping the stacks in a pyramid formation masking stacks as necessary. In all, I needed 4 masks that I could reposition as needed to create this pyramid of books.

I created one more stack of books. This time I die cut it and popped it up on top of the center stack. I knew I wanted my graduate to stand on that stack to symbolize her education lifting her up into the clouds. The cap from Smart Kitty (now retired, but if you have it in your stash...) it was the perfect size for the girl from School Days! I love how she seems to be waving goodbye too. Off to college!

I added a sentiment from Smart Kitty stamped onto the smallest rectangle from the 4 Bar Stitched Rectangle dies.

I love this one and I hope you do too! Thanks so much for stopping by!

Featured Supplies

For your convenience, here is a list of the featured Wplus9 supplies used on today's project(s), along with links to purchase.

Wplus9 4 Bar Stitched Rectangles Die
Shop at:
WP9
Wplus9 The Crew: School Days
Shop at:
WP9
Wplus9 The Crew: School Days Die
Shop at:
WP9

Saturday, May 21, 2016

For The Grad

Hello! Graduation season is upon us. This is Kara and where I live graduation is just a few weeks away. Since I interpret in a high school I need a few graduation cards for some special students.

WPlus9 has an adorable set called Smart Kitty that was designed with the graduate in mind. However, there is another set that I think is perfect for this occasion. Dream Believer is full of inspirational messages perfect for someone embarking on a new phase of life.  I've used both sets today along with a few others.

I started by creating a pattern with a small stamp from the Papel Picado set using Ocean Drive, Wild Mango, and Mojito dye ink. On top of my stamped pattern I added this quote from Dream Believer in Black dye ink.

I decided to add this adorable panda from Friends For All Seasons to draw your attention to the quote. He's wearing a graduation cap and tassel die cut and stamped with Smart Kitty.

Thanks so much for stopping by today. Have a great weekend!

Featured Supplies

For your convenience, here is a list of all of the supplies (or equivalents) used on today's project(s), along with links to purchase. Please note: this list does contain some affiliate links.


Tuesday, September 8, 2015

Get Sketchy Challenge #3

Hello Everyone, Joni here with another installment of the Wplus9 Get Sketchy Challenge.

The sketch will run from September 8th thru September 29th and we will announce the winner on September 30, 2015. We only ask that you use ONE Wplus9 product on your wonderful project to be eligible for the prize of a $20 store credit at wplus9.com, which you can use however you wish. But of course, you may use as many Wplus9 products as you'd like!

For my take on the sketch, I stamped the images from the Wplus9 Smart Kitty stamp set and colored the images with Copic markers.

After coloring with markers I adhered the ombre patterned paper from My Mind's Eye Market Street "Ashbury Heights" 6x6 paper pad. Then I stamped the sentiment, also from the Smart Kitty stamp set with Versamark ink onto a brown scrap paper and heat embossed it with white embossing powder to help it stand out on the top panel.

To finish off the card I added some Pretty Pink Posh sequins in Tangerine and Sparkling Clear.

Play Along

Now it's your turn!
Use the sketch at the top of this post along with at least one Wplus9 product (more is always welcome!) and upload your project to your blog or online photo gallery such as Flickr. Then link it up using the InLinkz widget below by July 29th to participate and keep the inspiration flowing!

If you'd like us to repost and share your creations on Instagram, be sure to use the hashtag #wplus9GetSketchy!

Prize

We will select one random participant to receive a $20 store credit to wplus9.com. The winner will be posted here on the blog on September 30, 2015.

Happy Crafting and Good Luck!

Get Sketchy #3 Entries


Tuesday, April 7, 2015

VIDEO: Smart Kitty

Hello everyone, Joni here.

I am so excited to announce that I am illustrating for Wplus9 and happy to formally introduce my very first stamp set - 
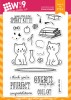
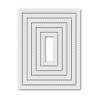
Smart Kitty! And, there is a companion die available as well!

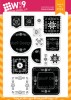
The Smart Kitty stamp set contains 7 Sentiments and 17 images.

The Smart Kitty Companion Die comes with 13 dies.

The images and sentiments in this set are perfect for school/graduation themed cards, but also versatile enough to work with many other themes, especially when combined with the other Wplus9 products you already have.

For this card I used watercolor (Distress Inks and Markers) to color this adorable kitty to try and achieve the fading of colors like the fading that we achieve from Copic coloring. In the video below, I show you how I achieve this look. To color these kitties, I prefer the #000 Round Cotman III by Windsor & Newton Watercolor brush. This small brush holds less water and is the perfect size for easily getting in all of the details on these images.

To begin my card I first stamped the kitty onto watercolor paper. I used Distress Ink in Crushed Olive to color in the ground using my paint brush. If you find you have too much water on your brush or on your paper, you can use a paper towel or dry cloth to soak up the excess water and then proceed to achieve the desired color you want. I usually let the paper dry a little bit to avoid mixing with other colors.

For the kitty, I used Distress Ink in Vintage Photo for the body and Walnut Stain for the spots. Remember to dilute your colors first with water as you pick it up with your watercolor brush and add more intensity of colors if you need to. Dab any excess water on your images with paper towel as you go or as needed to avoid puddling of colors.

Next, I stamped the stem with leaves from the set using the Distress Marker in Crushed Olive and for the rose image I used Worn Lipstick.

Don't forget, you can always make small adjustments to your stamped images if needed to fit your composition. I needed the stem on my rose to be just a little bit longer, so I used the pen tip of the Crush Olive Distress Marker to extend it a little - as if the kitty is holding the stem of the rose in its mouth.

For the background, I smooshed the the Peacock Feathers Distress Ink ink pad onto an acrylic block and added lots of water to dilute it. I used a flat watercolor brush to color the background, and used a paper towel to remove any excess water as I went along to get a very soft and faded look. Finally, I added some ink splatters using Wild Honey and Vintage Photo Distress Inks.

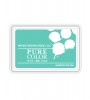
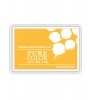
Since I made this card for a friend I used the gorgeous sentiment from Lucky Stars stamp set and stamped with my all time favorite brown ink, PURE COLOR Coconut Husk dye ink to finish the card.

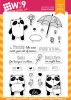
While we're her, I have one more card that uses the same technique. For this birthday card, I add a balloon using the Unforgettable stamp set.

For my sentiment, I used the Strictly Sentiments 5 stamp set along with the "Cool Cat" sentiment from Smart Kitty stamp set.

Wplus9 Supplies:

Stamps: Smart Kitty, Lucky Stars , Strictly Sentiment 5   Inks:  PURE COLOR in Coconut Husk dye ink 

Thank you so much for stopping by :)

Design Team Inspiration

Please be sure to stop by and check out the rest of the Design Team's creations for today:

Giveaway Alert

I have a Smart Kitty stamp set and Companion Die up for grabs over on my blog! Be sure to head over there for all of the details and to enter!


Connect with us:

Follow Us on Pinterest