Showing posts with label Dockside. Show all posts

Thursday, June 15, 2017

EASY Ombre With Kara

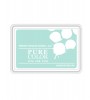
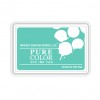
Hey Guys! My husband and I recently took a vacation to the Caribbean. And, I think you can see that influence in my project today. The colors of the sea are so gorgeous and the combination of Sea Breeze, Ocean Drive, and Siren Song PURE COLOR Dye Ink is the perfect match!

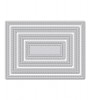
I started by adding color to a white card panel directly from the ink pad. Beginning with the lightest color, I swiped the ink pad across the piece of cardstock, covering approximately a third of the paper. When I was happy with the coverage I moved to the next color. I swiped the ink pad across the middle slightly overlapping the first color. I went back in with the first color to make sure the colors blended together rather than leaving a line. I did the same with the third and final color. Once the ink dried I die cut the panel with the 4 Bar Stitched Rectangle Die.

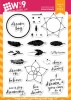
I knew I was creating this card for my brother's birthday so I went to my stash and pulled out some masculine sets. The first one I went for was Dockside. I absolutely love the design of this compass rose. I decided to do some collage style stamping, clustering elements and overlapping them to create interest and a focal point without covering up the beautiful blue/greens in the background.

I stamped three clusters creating a visual triangle to draw your eye around the card. The cluster to the right is larger establishing it as the focal point. I started with the compass rose and then added the anchor and birthday sentiment, also from Dockside. I added in Ink Splats in the same color as the background to make those elements of the collage less prominent than those stamped in black. Some stars from Little Bits and a cluster of dots from Dream Believer finish it off.

With the same compass rose, I stamped another piece of white cardstock to create an envelope liner.

Thanks so much for stopping by!

Featured Supplies

For your convenience, here is a list of the featured Wplus9 supplies used on today's project(s), along with links to purchase.

Thursday, June 9, 2016

Shimmery Waves With Kara

Didn't you just love this month's release? So many great stamps and companion dies to choose from. Along with those, Dawn released several stand alone border dies like the one I'm sharing today, the Wave Border Die.

I knew I wanted to add some color and shimmer to these waves. I tried die cutting first and then sponging on the color, but I found that those delicate waves were easily bent that way. Instead I added color to my white cardstock, blended, and then die cut my waves last. Wanting the tips of the waves to be darker, I first sponged on Bo Peep dye ink. I worked the ink into the paper from the edge. Once I had applied enough ink to cover the entire area that the die would cut and emboss, I added some Nautical Navy to the edge of the card stock. Positioning the die on the cardstock so that the crests of the waves were in the darker ink, I ran it through my die cutting machine. I added some shimmer to the waves with a clear Wink of Stella glitter pen. To mask the uneven blended edge of ink at the bottom of the wave I added a strip of cardstock coated in Nautical Navy ink. Custom cardstock!

These waves can be used with so many other sets to create scenes, but I knew it would make a beautiful masculine card if I paired it with Dockside. I guess I was right, because this was the first time my husband actually said to me, "Can I have this card?"! What do you think? Should I give it to him? ;) Of, course I will!

Thank you so much for coming by today! Have a wonderful weekend and enjoy your new goodies when they arrive!


Featured Supplies

For your convenience, here is a list of all of the supplies (or equivalents) used on today's project(s), along with links to purchase. Please note: this list does contain some affiliate links.

Sunday, July 27, 2014

VIDEO: Textured Die Cuts

Hi guys!

Today's video features a little experimenting with Martha Stewart's White Texture Effect and die cutting. I bought this stuff a while ago and wasn't quite sure what to do with it...until now.

While on vacation recently we spent an entire day finding sand dollars and starfish in the ocean...along with sea cucumbers, urchin, and some slimy slug things that I would just like to forget about altogether. LOL But, it did get me thinking that the texture of this paste was perfect for recreating sand and for creating the texture of starfish and sand dollars.

So when I got home, I did a little experimenting...and it worked!

It doesn't dry chalky or too hard, there wasn't any flaking or cracking, so it was a great candidate for die cutting. I spread a thin layer over card stock, allowed it to dry and then die cut it. Watch the video below to see this card from start to finish as well as some tips along the way.

Watch above or in HD at YouTube

I hope you enjoyed today's video! I'll be back soon with a shaker card video featuring this same paste and more stencils.

Thanks for stopping by and I'll see you soon!


All Featured Supplies

Connect with us:

Follow Us on Pinterest