Are you ready for the Wplus9 Holiday 2014 Release? We have lots of new products hitting the stores on October 5, 2014. But before they officially go on sale we are going to spend the next couple of days previewing all of the new stamps and dies and showing you some fun ways to use them. You can find all of the new products at the bottom of this post.
Remember, the entire Holiday 2014 release will be available for purchase beginning October 5th at wplus9.com as well as at many of your favorite retailers.
We have two new sets that are a little different from our usual style. I don't normally do "cute". I can illustrate it, but I usually have trouble executing the images into a card design. So, I decided to tackle those first. You know? To get them "out of the way" in case I had trouble.

Oh how wrong I was!
I had SO much fun with Merry Little Christmas and Merriest Wishes! These sets feature three elves - Rebecca Elf, Hunter Elf and Carter Elf - they are a playful little bunch and a blast to color. I used Copic markers for both of my examples today.
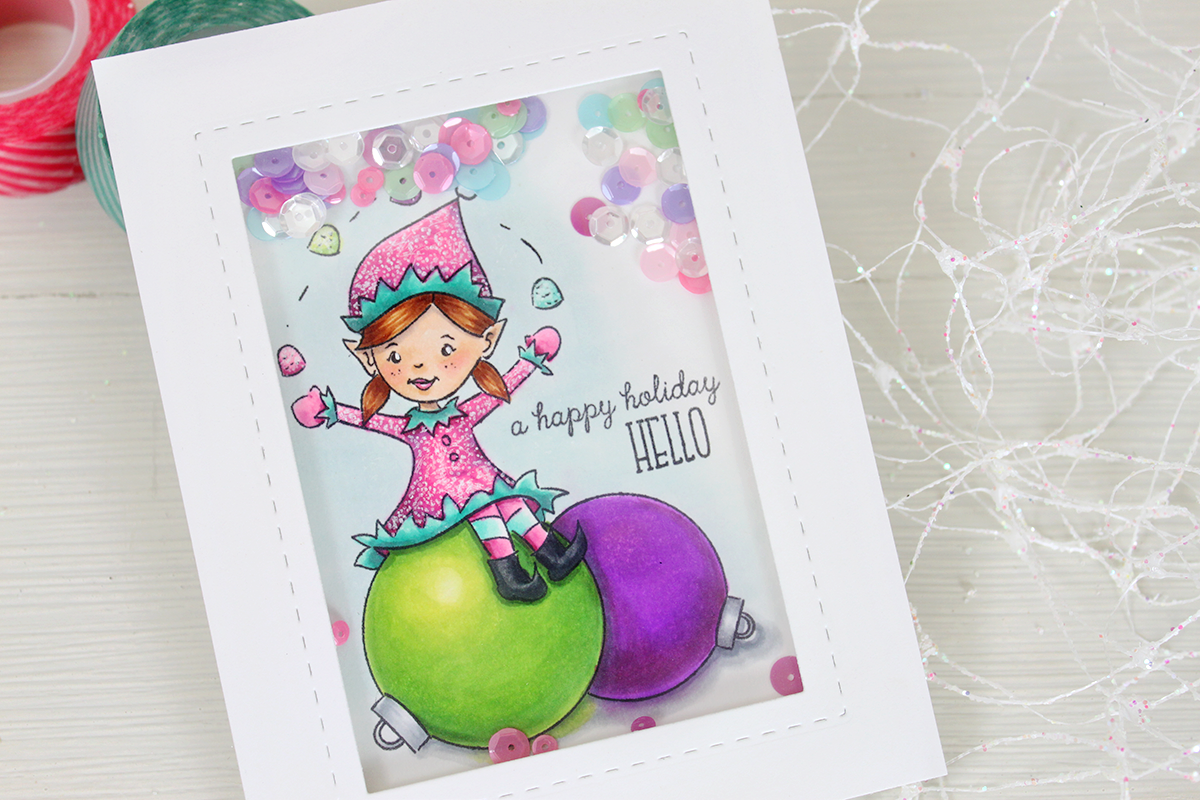
I colored Rebecca Elf in bright colors for a non traditional Christmas color scheme. I decided she needed a little sparkle to her outfit and used a white gel pen to add a "sequin" shimmer.

I decided to go with the playful vibe of the image and turn this into a shaker card using a ton of Pretty Pink Posh sequins. This was super easy thanks to the new Holiday Apertures Die also being released. I did not have this use in mind when I designed this die, but let me tell you...this is one versatile die!

Wouldn't this be a fun Holiday card for a little princess?
Next up, a fun card in traditional colors featuring Hunter Elf. I stamped the main image of Hunter sitting on an ornament, masked him and then added several more ornaments using the single ornament stamp included in the set.

Again, I colored everything using Copic markers and added some shimmer to the large red ornament using a clear Wink of Stella pen. It's not really showing up too well in the photos, but it is so pretty in real life and really adds the extra little "something" to the design.

I finished the card off with a sentiment also included in this set and adhered the panel directly to a Cupid's Bow card base. This font combo is one of my new favorites. It can easily go from cute and playful to more modern and trendy.

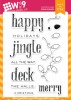
I have one more card to share with you today. This one features the Festive Greetings stamp set paired with more Copic coloring.
This is another one of those sets that can stretch across several genres. Today's example is bright and colorful.

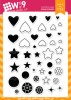
I started by stamping the main large "Jingle" sentiment and then stamped the separate string of lights directly over it. Next I stamped three additional single bulbs on separate paper and colored them. I cut them out, adhered them over the bulbs that were overlapping the greeting, and finished coloring the rest of the bulbs. I wanted the lights to look entwined in the sentiment. Looking at the photos, I probably should have left the blue bulb behind the "J".

To help reinforce the look of a "glow", I used a Q-Tip to apply a very light halo of chalk pastels around each bulb in their respective colors. The finished panel was adhered to a Black card base. Flat and perfect for mailing!

I really hope you enjoyed today's cards. Sometimes going outside of your comfort zone can be a lot of fun! I'll have more featuring these sets, including a video, a little later this week. If there's anything you'd like to see a video on or more information about the featured cards today, be sure to leave it in the comments below.
I'll be back tomorrow more to share!
Design Team Inspiration
- Kara Vrabel - Be sure to stop by and see Kara Vrabel, she is featuring several of the new release items, including Winter Woodland and Snowflake Backdrops - demonstrating how well everything can be used together.
- Joni Nina Andaya - And Joni is sharing more of Merriest Wishes and Merry Little Christmas!
Holiday 2014 Release - available 10/05/14
Photopolymer Clear Stamps

Merriest Wishes
4x6" Clear Stamp Set
$14 USD

Merry Little Christmas
4x6" Clear Stamp Set
$14 USD

Winter Woodland
4x6" Clear Stamp Set
$14 USD

Snowflake Backdrops
4x6" Clear Stamp Set
$14 USD

Snowflake Backdrops
4x6" Clear Stamp Set
$14 USD

Twenty Fifteen
4x6" Clear Stamp Set
$14 USD

Strictly Sentiments 6
3x4" Clear Stamp Set
$6 USD

Hand Lettered Holiday
3x4" Clear Stamp Set
$6 USD
Steel Rule Dies

Hand Lettered Hello Die
$6 USD

Holiday Apertures
$16 USD

Landscape Borders Die
$12 USD

Snowflake Trio Die
$7 USD

Stag Trio Die
$12 USD

Winter Woodland Companion Die
$9 USD
Giveaway Alert
So what do you think? Would you like to win the Merry Little Christmas and Festive Greetings stamp sets before you can buy them? Would you like to see more sets like these from Wplus9 in the future? Just leave a comment below by 10:00 a.m. EST on 10/02/14 to enter. I will select one random winner from all comments. Winner will be posted on our Releaser Winners page by noon.
Good luck and thanks for stopping by!