Hey! It's Kara. I'm back again, but this time with something much softer. I love bold color, but this subtle watercolor background is just so pretty.

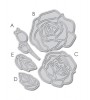
I knew I wanted to use the beautiful Outlined Roses Die. This die set came out several months ago but I never had a chance to use it. I decided I wanted to back them with some soft watercolor. I die cut the roses, leaves and buds from white cardstock and moved them around on my panel to decide on placement Once I knew where I wanted each die cut to be I added the appropriate color to an acrylic block in that general position. For example, I wanted the large rose to be in the upper left hand corner so I added some pink distress ink to the acrylic block in that same area. I added green where the leaves would be placed. Once the acrylic block was coated with ink, I spritzed some water on the ink to activate it's watercolor-like properties. I then placed a piece of watercolor paper onto the acrylic block. I left it there for several seconds applying pressure. When I removed the cardstock from the block some of the ink had started to mix and create a brown color that I did not want. I quickly absorbed some of the color with a piece of chamois and unexpectedly created a subtle texture that I loved!

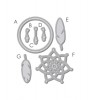
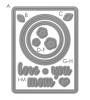
While I let the watercolor piece dry, I decided to die cut another set of flowers and leaves. I was then able to layer up the die cuts and make them a bit sturdier. When the piece was dry, I applied the die cuts using a liquid adhesive. I knew that whatever sentiment I decided to add it had to be just as soft and also not hide the beautiful background. Vellum was the answer. I used a die cut vellum circle from my stash. It had been cut with the Love Mom Layers die. I stamped a sentiment from Strictly Sentiments 5 in Versamark ink and embossed it in white. This circle die cut from the Dreamcatcher Die fits perfectly around the circle and creates the perfect frame. I did the same thing, layering 4 die cuts this time to vary the dimension.

You can't see any adhesive behind the vellum because I found that if you run it through a Xyron sticker maker and burnish it well the adhesive coats the back of the vellum entirely and does not show!
I love it and I hope you do too! Happy Friday and have a wonderful weekend! See you again soon!

Featured Supplies
For your convenience, here is a list of featured supplies (or equivalents) used on today's project(s), along with links to purchase. Please note: this list does contain some affiliate links.