Showing posts with label Bountiful Blooms. Show all posts

Friday, February 22, 2019

GUEST ARTIST FEATURE: Watercolor Markers w/Carissa Wiley

Hi everyone! It’s Carissa Wiley here with you today. I have a fun project to share with you featuring the easiest watercolor ever, using water-based makers.


Watch above or watch in HD at YouTube

Honestly, I like to refer to this as the lazy watercolor method.

I think a lot of times as crafters, we over think things. We think things have to be complicated or time consuming to get great results. I fall in to this trap a lot and I have to remind myself that sometimes simplicity is best for me….even when it comes to techniques.

I don’t want to downplay the beautiful results that you get with traditional watercolor methods…they are absolutely stunning. But if that is something that is intimidating to you, I want to show you that you can still achieve beautiful results with simple techniques.

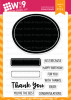
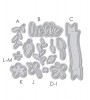
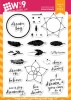
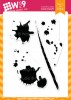
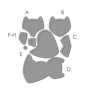
This card features just a few supplies, including the Hello And Thanks stamps and dies, and Citrus Background Builders stamps from WPlus9 - linked at the end of this post. I added a simple banner from the Bountiful Blooms die set to ground my sentiment.

I’ll walk you through the creation of this card in today’s video tutorial, so be sure to check that out. I’ll talk you through how I created beautiful watercolor images with just a couple water-based markers and a brush. If you want to watch this video in HD on my YouTube channel, click HERE. While you’re there, don’t forget to hit that thumbs up, subscribe and turn on the notifications.

Thanks for stopping by today. I hope you enjoyed this project. Until next time, I hope you have a fabulous day!

Featured Supplies

For your convenience, here is a list of the featured Wplus9 supplies used on today's project(s), along with links to purchase.

Wplus9 Bountiful Blooms Die
Shop at:
WP9
Citrus Background Builder
Shop at:
WP9
Hello & Thanks
Hello & Thanks
Shop at:
WP9
Hello & Thanks Die
Hello & Thanks Die
Shop at:
WP9

Monday, February 26, 2018

Stitching On Black Cardstock With Kara

Hey guys it's Kara. I know you have been loving these stitching dies as much as I have! There are so many ways to use them and today I thought I'd share a look at stitching on black cardstock.

Originally, when using this large heart from Needle Point Hearts, I went right to white cardstock thinking that the floss would pop. However, if you choose the right colors, your floss will pop on black too! Play around and try different colors. I knew I wanted to use white and hot pink seemed like another natural choice. When I laid the floss on my cardstock it looked great!

I just did some simple stitching around the heart starting with white on the outsides, moving to light pink and then finally a darker pink in the center. I added a sentiment from Bold Banner Greetings on a simple banner die cut from Bountiful Blooms. I didn't want to cover up too much of the stitched heart.

Super simple, and super sweet! Thanks so much for stopping by today!

Featured Supplies

For your convenience, here is a list of the featured Wplus9 dies used on today's project(s), along with links to purchase.

Wplus9 White Cardstock
Shop at:
WP9
Wplus9 Black Cardstock
Shop at:
WP9
Wplus9 4 Bar Stitched Rectangles Die
Shop at:
WP9
Wplus9 PURE COLOR Black Dye Ink
Shop at:
WP9
Wplus9 Needle Point Hearts
Shop at:
WP9
Wplus9 Bountiful Blooms Die
Shop at:
WP9

Friday, October 13, 2017

The Crew: School Days With Kara

Hello! It's Kara and I'm back today to share a fun-to-create card for the book lover in your life using the new The Crew: School Days stamp set.

As I've mentioned before, I interpret for students in a high school. Last week was our librarian's birthday and I wanted to create a special card for her. She is such a great resource for the staff and students. When I was thinking about what kind of card I wanted to make her an image of her at her desk surrounded by books came to mind. I knew that with the new School Days stamp set I could easily create that.

I started by stamping the stack of books stamp repeatedly on white cardstock to create the background.  I wanted to leave that black and white so that the books in the foreground really stood out. I stamped and die cut the same stack of books quite a few times, as you can see. This time I colored them with Copics in primary colors to keep it bright and fun.

I love that the people in this set, as well as the Garden Club set, have many different styles of clothing and hairstyles so that you can customize it to you recipient. Once she was colored, I tucked her in behind the large oval window that I die cut using the Basic Greetings die. I then stacked the books around her using various adhesives to add dimension.

A simple 'You're the best' sentiment embossed on a black banner from Bountiful Blooms Dies is the finishing touch. She loved it and I hope you do too! Thanks so much for stopping by today and I'll see you again soon.

Featured Supplies

For your convenience, here is a list of the featured Wplus9 supplies used on today's project(s), along with links to purchase.

Monday, September 4, 2017

You're The Best With Kara

Hey Guys! Kara here with a sweet little fox card to let you know you're the best! You always leave the nicest comments and I really appreciate it!

I have mixed together so many sets on this one project and I love it! I started with the Watercolored Anemones set. I die cut a bunch of flowers and leaves and stamped them all out. I started to arrange the flowers and leaves on a piece of white cardstock to see what I liked. I felt that behind the die cuts I needed something stamped in the background. I wanted something without too much visual weight because the die cut flowers in the front were quite heavy. I used a very thin lined image from Botanical Bunch. I chose to stamp it twice in Cranberry Crush ink, the darkest color in the flowers but stamped in the least amount. This helps to balance the colors. I decided to add in the cute fox and because his eyes and nose were black I wanted to add in more black to the design. A few berries from Botanical Bunch and some dots from Dream Believer add just the right amount.

I wanted to extend the size of the background stamping a bit, but in a more subtle color. I chose to use the lightest color from the flowers, Shell Pink. I used an image from Ink Splats for this.

Underneath I added a black panel and accented two corners with just a few elements of the main design. A banner tucked into the floral spray with a simple sentiment finishes it off.

I hope you like it. Thanks again for stopping by. You're the best!

Featured Supplies

For your convenience, here is a list of the featured Wplus9 supplies used on today's project(s), along with links to purchase.

Connect with us:

Follow Us on Pinterest