Showing posts with label Beautiful Bouquet: Mums. Show all posts

Wednesday, January 11, 2017

GUEST ARTIST FEATURE: Therese Calvird

Hi there, it’s Therese Calvird and I’m thrilled to be here at the WPlus9 blog!

If you know me then you know that I adore floral designs and Dawn has those nailed. The Beautiful Bouquet series of stamps has a new addition called ‘Mums’ and for my first video I decided to create my own ‘coloring book’ style card.

Watch above or watch in HD at YouTube

Today I used Polychromos pencils to add colour to my flower. These pencils are easy to use and have an oil based binder which means they are ‘harder’ (or sturdier) and, also less likely to produce a wax bloom, so the intricate details in this Chrysanthemum are not lost. I also thought this design needed a bright bold sentiment, so I combined the Sending Hoping Wishing stamp and die set to create this.

WPlus9 also has the most amazing critter stamps, and the new Happy Gang set is so unique. As soon as I saw it, I knew it had many possibilities. And for my second video today I decided to create my own little scene on a children’s card.

Watch above or watch in HD at YouTube

These images are perfect to add details and make them your own. For this design, I used my Prismacolor Pencils to add some shading and depth to the puppy as well as create the grass and colour the sky. I also added a cute little speech bubble sentiment from the Friends for all Seasons: Fall set, and of course, having the matching dies makes creating a breeze.

I would just like to say a big thank you to Dawn and WPlus9 for inviting me here today, I’ve had a blast creating these cards and I hope that you have enjoyed them too! Happy Papercrafting!

Featured Supplies

For your convenience, here is a list of featured supplies (or equivalents) used on today's project(s), along with links to purchase. Please note: this list does contain some affiliate links.

Tuesday, December 20, 2016

Last Minute Crafty Christmas Gifts

Hello everyone! This is Natalia Valkovskaya and I’m so happy to be back to share with you three last-minute gift ideas featuring a whole bunch of amazing WPlus9 goodies. I apologize in advance – this is going to be quite a long post, so make yourself some coffee or tea, take a moment to relax and hopefully get inspired.

No matter how well I plan my gift list, there’s always someone who skips my mind or there’s some unexpected occasion for which you need a quick but lovely gift. If you are anything like me, I hope you’ll find these ideas helpful. Besides, they won’t break the bank, as you’ll be using the supplies you most likely already have. So let’s jump right in.

Hot Cocoa In A Jar

What can be better on a chilly winter evening than to cuddle up on the couch with a mug of hot chocolate and watch a favorite film or read a book? Only a mug of home-made hot chocolate! So I think that home-made mix of instant hot chocolate will make a truly heart-warming gift. Especially, when you give it in a pretty jar.

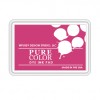
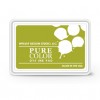
I die-cut two circles from green cardstock and WPlus9 kraft card stock. Then I die-cut leaves of holly from the kraft circle using the Woodland Basics Die. Before layering the two circles together, I stamped the green circle with Background Builders: Knit using PURECOLOR Dye Ink in Appletini to add some interest. I adhered the circle to the lid with Mod Podge Glossy Finish. Finally, I added the berries with Nuvo Crystal Drops in Red Berry.

Of course you need a tag to finish off the gift, right? I die-cut it using Gift Card Layers Die and decorated it with greenery, for which I used the Woodland Basics Die again.

Notebook Goody Bags

A few days ago my daughter told me that some of her friends were coming over, and she wondered if we had anything to give them. No time to panic. In the evening I made these cute little notebooks.

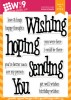
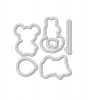
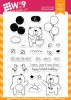
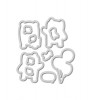
I added a fun pen, some holiday candy, and made a matching topper for the bag. I personalized it using the Whimsy Alpha stamped in Gala Red - which is a perfect red in my book - and voila! A cute little gift for your young guests is ready! Look how the funky little fox from Friends for All Seasons: Winter is waving hello!

Creating the notebooks is really easy. I used plain printer paper for the inside. I just trimmed it in half and then folded it in half, used my bone folder to press the crease and then stapled along the crease. I used Kraft card stock for the covers, and decorated them with the Holiday Houses and Friends for All Seasons: Winter stamp sets. I chose to keep it simple and stamped them in Black and White ink. I added a few details with a white gel pen. I adhered a label to the front - Gift Card Layers Dies again came in handy - so that the owner could write on it, e.g their name or the subject, etc.

My daughter and her friends absolutely loved these! In fact, we are going to make more for her classmates. By the way, take a different stamp, for example the Beautiful Bouquet: Dahlia , and this little notebook will make a handy gift for your, say, colleague.


Thank You Card Set

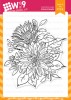
We all need cards to thank people for the lovely gifts we get during the Holiday Season. Here’s a quick set of cards using the absolutely gorgeous Feathers and Florals stamp set and a bunch of PURECOLOR Dye Inks. Not really Christmas-y, but I’m absolutely in love with this set – so versatile, and besides, why limit the recipient with the season?

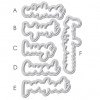
I went for one-layer cards on WPlus9 Oatmeal card stock with the Feather's & Florals stamp set. I just love the texture and rustic look of it. I paired the cards with matching Oatmeal Envelopes and wrapped them in paper that I stamped to match using the same stamp set. Tie with jute twine to continue the rustic look, and attach a tag. And that’s it! Quick and pretty!

I kept the cards themselves very simple. To create the color blocks, I pressed ink pads against the card base. I used Shell Pink, Sea Breeze, Lake House, Wild Mango, and Bo Peep. Love the distressed and artsy look of the background!

For the sentiment, I used the Hand Lettered Thanks stamp set stamped in Black.

Thank you so much for staying with me until the end. I told you it would take a while! Wishing you and your loved ones all the best in this holiday season! Make happy memories, be safe, and happy crafting!

Tuesday, July 12, 2016

Embellishing Watercolor Cards with Joni

Hello everyone, Joni here, I know that a lot of us love to watercolor images. But, sometimes it can be difficult to decide how to embellish them without detracting from all of your beautiful work. If you want to add more to your design after watercoloring - to give it more impact - I've got a few ideas that I find work really well to share with you.

I started by stamping the Chrysanthemum image from Beautiful Bouquet: Mums stamp set onto watercolor paper using Versamark ink and heat embossed the image in white. Next, I watercolored the images using my old Windsor & Newton watercolor palette. But of course, any watercolor markers or palette you already have will also work.

I chose vibrant colors for my floral images and then a soft muted color to fill in the background. This contrast really makes the flowers pop even more. For a little more texture and interest, I added some deeper splatters using a more concentrated mix of the background color.

For the inside of my card I added a stamped panel of mum images. I wanted to include a gift card on the inside. So I used the Gift Card Layers Die to cut four corner notches to tuck the gift card into and securely hold it in place.

Next, I stamped the "you are" and "amazing" from the That is All stamp set. For a little dimension, I used the That is All Companion Die to die cut the "amazing" and adhered it with foam tape. I assembled my card. I added a strip of foil washi and adhered the watercolored panel on top of the white card base.

To kick it up a notch, I then applied Stickles in Diamond color on top of each of the mum images and let it dry. Finally, I also added some Liquid Pearls in White Opal to background of the card in clusters - this is a great alternative to sequins.

That's it. Here's another look at the finished card.

Thanks for dropping in, I hope you enjoyed!

Wednesday, June 22, 2016

GUEST ARTIST FEATURE: Yoonsun Hur

Hello crafty friends, Yoonsun Hur here from Rejoicing Crafts! I am so happy to be a guest for Wplus9 today! Wplus9 is one of my favourite stamp companies for sure and oh, I am so honored!

Today I am sharing a couple of my watercolour cards with some beautiful flower stamps - Beautiful Bouquet: Mums and Botanical Bunch.

For my first card, I paired the new Beautiful Bouquet: Mums stamp set with the older Botanical Bunch stamp set. First, I stamped the image from the Beautiful Bouquet: Mums set onto watercolour paper with VersaFine Pigment Ink Onyx Black, and then filled in the bouquet even more with a few of the single floral images from Botanical Bunch. I trimmed the finished panel with a stitched rectangle die. Next, I watercoloured them with Kuretake Gansai Tambi Watercolor using a paint brush. For the sentiment, I stamped it from the Beautiful Bouquet: Ranunculus set on the watercoloured panel in black. Finally, I mounted the panel on an A2 sized kraft card base using dimensional foam tape.

I have another watercolour flower card featuring my all-time favourite, the Botanical Bunch stamp set. I tried to create a subtle, yet lovely watercolour effect.

First, I stamped the clustered flower image from the Botanical Bunch set at the top & bottom part of watercolour paper panel with Worn Lipstick Distress ink. I then brushed them with a bit of water using waterbrush. Next, I watercoloured the rest areas with Worn Lipstick , Picked Raspberry, Wild Honey, and Spiced Marmalade Distress inks using a wet paint brush, then added the Perfect Pearls Mist here and there.

For the sentiment, I die cut the word “Hello” from white card stock using the Hand Lettered Hello Die four times and glued them together using a fine tip glue pen.

Once the panel was dry, I mounted it on an A2 sized white card base using double-sided tape, and then adhered the sentiment die cut at the centre of the card using a fine tip glue pen.

Thank you so much for joining me today!

Wednesday, June 8, 2016

Monochromatic All Occasion Card Set with Maureen

Hi all! This time of year means lots of mass producing for me. We are about two weeks out from the end of school and I am busy making end of the year gifts for my children's teachers. I couldn't wait to put some of the newly released product to work!

While Beautiful Bouquet: Mums looks stunning colored, it looks just as beautiful simply stamped in the background, don't you think?

Each card in the set features a different sentiment from That is All. The larger words were die cut using the newly release That Is All Companion die set. I love having the ability to die cut the sentiment like this and place it over the stamped image.

I hope you liked my project today. Thanks for stopping in!


Featured Supplies

For your convenience, here is a list of all of the supplies (or equivalents) used on today's project(s), along with links to purchase. Please note: this list does contain some affiliate links.

Connect with us:

Follow Us on Pinterest