Hello! Our newest products - the August 2014 Collection - is now available for purchase! Remember, you can find everything at wplus9.com, as well as at many of your favorite retailers.
Wplus9 August 2014 Collection


I have more inspiration to share with you today, featuring Hand Lettered Thanks and Flora & Fauna 2. In fact, I've been having so much fun with these sets, that I decided to split this post in two.
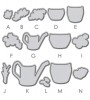
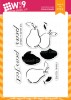
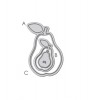
Flora & Fauna 2 has so much potential. You can color it with Copics, pencils, watercolors etc., or just simply stamp it. All of the images in this set are based off of sketches that I have done in the past for watercolor paintings. You can make it as simple or intricate as you'd like.
Today, I wanted to share a few more simple ways to use this set. This first sample looks a lot more difficult than it really is.

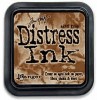
I started by stamping the images in Tim Holtz Distress Ink in Frayed Burlap and allowed that to dry or "cure". Then I used Tim Holtz Distress Markers to color it. I colored directly onto the watercolor paper and used a paint brush with very little water on it to soften and spread the color. This technique is really more like coloring it with Copic Markers than watercoloring. Since I used so little water, it makes this a lot less intimidating and easier to control.
For the sentiment, I stamped the sub-sentiment first and then masked it using a cut down piece of washi tape. Then I stamped the big "you" from Hand Lettered Thanks directly on top and then removed the mask.

This little trick allowed me stamp the "are such a blessing" without the "y" in "you" obscuring it.
Since we stamped the outlined images in Frayed Burlap (a slightly darker color) and allowed it to dry into the paper, the veins in the butterflies wings and details in the flowers remained and show through. I just LOVE this look!

Next up, I used the same technique, but a little more water. You'll notice that the colors are a little softer and the "fades" are more prominent, especially in the hummingbird thanks to a little more water.
This is a great way to build up your confidence incorporating watercolor into your work. And once you are comfortable you can start adding more water and eventually move to painting with the color.

Again, you see how some of the detail in the hummingbird's chest and throat remained. This adds just a touch of detail that you didn't have to do any work to achieve. Score!
My last cards for today demonstrate just how versatile these images are.
Coloring not your thing? Soft and girly not your thing?
No Problem!

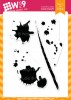
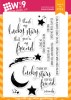
How about a graphic note card set. You all know how much I love pairing opposites. Here I've used our Ink Splats stamp set to lay down some color and then just stamped the outlined images over top in Black.

I added a sentiment to each using Hand Lettered Thanks, rounded one corner, and called it done!

Really doesn't get much easier than that, does it?!
Hope you enjoyed today's post. Like I said, I've split this into two. I will be back with more samples and a couple of videos that pair traditional watercolor with these stamps. You will not be able to believe that these started with stamps! And, it's totally do-able!
Thanks for stopping by! See you soon!
All Featured Supplies