Sunday, March 27, 2016

VIDEO: Watercolor Stamping with Hand Doodling

Hey guys! Today I've got another fun video with a way to use your stamps while adding a little something that makes it unique to you - watercolor stamping with hand doodled details.

Watch above or watch in HD at YouTube

Watercolor stamping is always a way to make sure that each card looks unique even though you are using the same images as many other people.

However, by taking it a step further and adding your own hand doodled details, you can add your own personal flair. Plus, you're breathing new life into those stamps! Win-win!

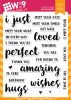
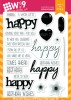
For today's projects, I played around with older and newer sets - Whole Lotta' Happy and That Is All. You can really never go wrong with a good balloon image, can you? And the simple shape makes it a perfect candidate to dip your toes into doodling.

While I was at it, I used the same layout, but this time paired Whole Lotta' Happy with Happy Mail.

It's a very simple card and easy to mass produce. Plus, it just makes me smile. Another win!

Thanks for dropping in. I hope you are having a wonderful Easter weekend!

Featured Supplies

Friday, March 25, 2016

Glittered Artist Palette with Kara

Hey Guys! It's Kara and today is the first day of my Spring Break! When I'm not crafting, I'm an American Sign Language interpreter for a deaf student in high school. I love it, but Spring Break? Yes, please! In honor of spring, I have a glittery rainbow to share with you.

Double sided adhesive is a wonderful thing, especially when it comes to using glitter.  The most common complaint that I hear about using glitter is related to the mess.  When you use double sided adhesive it really cuts down on the mess.  The glitter sticks instantly, unlike with liquid glues.

I'd love to paint with this glittery rainbow!

Creating the Glittered Palette

Start by prepping the palette for the glitter. Apply double sided adhesive to a piece of white card stock, leaving the release paper in place on the exposed side. Position the Artist Palette Die on top of the cardstock with the release paper side up. Run it through your die cutting machine. My machine cuts the perimeter of the die on the first pass, but not all the way through the individual wells of color, which is perfect for this. Now it's time to add the glitter, and we'll do this is stages:

  1. Remove the release paper from one of the individual blobs of paint and add a little sprinkle of glitter. Press the glitter into the adhesive, shake off the excess. I always do this on a piece of copy paper for easy clean up. Repeat for the remaining colors, working one at a time to keep the glitter colors separate.
  2. Carefully remove the rest of the release paper from the palette. I find that peeling from the end opposite the thumb hole prevents stray glitter from attaching itself to the palette.
  3. Add your background glitter.  In this case, I wanted white, but you could use any color you like.

I did the same for the paintbrush, carefully peeling back the release paper to reveal specific portions to add glitter by desired color.

I added a simple white heat embossed sentiment using the Color My World stamp set. I enhanced the word 'color' with a copic marker that was a shade darker than the Ballet Slippers cardstock card front. A little added detail comes from the Sunshine Layers Die. I've layered the card front up with a piece of vellum and black cardstock cut with the same die.

I hope you've enjoyed! Thanks so much for coming by today.

Featured Wplus9 Supplies

Monday, March 21, 2016

GUEST ARTIST FEATURE: Wanda Guess

Hi there! It’s Wanda Guess, and I am so delighted to be here as a guest designer today! I have been a WPlus9 fan for a long time! Their stamps bring me lots of joy in my craft studio. I am also a huge fan of Dawn and her entire creative team. They make magic happen! I had a hard time deciding which stamp set I wanted to use for my post. I finally decided to use the gorgeous Doodle Buds Stamp Set and Companion Die along with some bright cheerful colors for Spring.

There is a whole lot of color going on here! I stamped my images in crisp black ink onto watercolor paper, and die cut them all out with the matching Doodle Buds dies. Then I had lots of fun coloring with my Kuretake Zig Clean Color Markers. The brighter the better!

The sentiments in the Doodle Buds stamp set are so pretty! I stamped the ‘hello’ on a white stitched circle and layered it onto another white circle for some more pop.

Here is a close up of the flowers. For this type of coloring I colored my markers directly onto the paper - and put down a lot of ink. Then I took my paint brush and water and mixed the color around until I got the effect I wanted. I used a couple of different shades for each flower and for the leaves.

In this photo you can see how I layered everything with lots of foam tape! The center of the main pink flower is a separate piece. I layered my card with bright yellow cardstock and black & white gingham.

I added a few lime green enamel dots at the end. I kinda love enamel dots!

This card would be pretty in muted colors, or all one flower too. They are so easy to make and easy to mix and match to your own style!

I hope you all have a wonderful, beautiful and creative day! Thanks to the lovely ladies at WPlus9 for having me!

Saturday, March 19, 2016

The Chalkboard Technique with Maureen Merritt

The Chalkboard Technique is not only popular in home decor, we continue to find the Chalkboard technique in papercrafting as well. It seemed like a passing trend when it first started popping up in the paper crafting industry a few years ago, but it looks like it's here to stay.

And it's a technique that I turn to time and time again.

You only need a few items for this technique and it's quite easy to do, making it perfect for new stampers. First you will heat emboss your sentiment in white on black card stock. Alternatively, you could use a green shade reminiscent of chalkboards back in the day. You will then sponge White Pigment ink behind the sentiment and around the edges of the card stock. Easy Peasy!

Here's another card using the same technique.

 Wplus9 Supplies:
Stamps: Pretty Little Peonies, Happy Wishes  // Inks: White Pigment Ink, Ocean Drive, Wild Mango, Sweet Nectar, Beanstalk Dye Inks // Dies: Sunshine Layers Die // Cardstock: White, Black

Thanks for spending some time here with me today.  I hope that you are having a great crafty weekend!

Connect with us:

Follow Us on Pinterest