Hey Guys! Kara here. A few weeks ago I shared one of the methods I use for getting my card making creativity going again, Stamp Set Roulette. Today I have another little tip that always helps me when I'm feeling a little stuck.
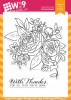
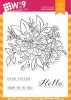
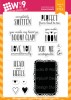
I knew I wanted to use all of the sentiments in the Unconditionally stamp set to create a background. The font combination is awesome and the sentiments are very sweet! After that I had no clue what I wanted to do with it or how I would turn it into a card.

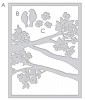
For the background I started by arranging all of the stamps on a large acrylic block, including some of the heart stamps in the set. I inked everything up with some black ink and stamped in the center of the card front. I loved the look of the background but had no idea where I wanted to go from there. This brings me to my tip. We all have those left over die cuts that didn't make their way onto a previous project. Some are just cardstock, some have been stamped and some have even been colored. Grab that stash and start placing things on and around your project and I guarantee the ideas will start to come.

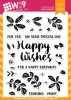
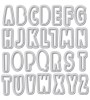
Even if you don't end up using the actual piece from your stash it will spur an idea and you can get to work. In my case today the flowers, leaves and yellow bird came directly from my stash. There were some Whimsy Alphabet letters in there, but not these. I liked the look of the letters with the design, but I decided I wanted to spell 'love' and would need to die cut those letters. Because the Happy Wishes flowers were already stamped in Hayride and Mojito, my color scheme was decided for me. I sponged some Mojito ink onto my letters to match. I decided I wanted another little heart so I die cut one from the Love Notes die and colored that with Mojito as well.

Finally, I positioned all of my die cuts on the stamped background strategically highlighting certain sentiments.
Thank you so much for stopping by today. I hope this tip is as helpful to you as it is to me!

Featured Supplies
For your convenience, here is a list of featured supplies (or equivalents) used on today's project(s), along with links to purchase. Please note: this list does contain some affiliate links.


 Wplus9 Watercolored Anemones Clear Stamps
Shop at:
Wplus9 Watercolored Anemones Clear Stamps
Shop at:
 Wplus9 Valentine Wishes Stamp Set
Shop at:
Wplus9 Valentine Wishes Stamp Set
Shop at:
 Wplus9 Valentine Wishes Designer Dies
Shop at:
Wplus9 Valentine Wishes Designer Dies
Shop at:
 WPlus9 Coconut Husk Dye Ink
Shop at:
WPlus9 Coconut Husk Dye Ink
Shop at:
 WPlus9 Miami Spice Dye Ink
Shop at:
WPlus9 Miami Spice Dye Ink
Shop at:
 WPlus9 Sweet Nectar Dye Ink
Shop at:
WPlus9 Sweet Nectar Dye Ink
Shop at:
 WPlus9 Flamingo Dye Ink
Shop at:
WPlus9 Flamingo Dye Ink
Shop at:
 Wplus9 Shell Pink Dye Ink
Shop at:
Wplus9 Shell Pink Dye Ink
Shop at:
 WPlus9 Little Piggy Dye Ink
Shop at:
WPlus9 Little Piggy Dye Ink
Shop at:
 WPlus9 Sweet Gelato Dye Ink
Shop at:
WPlus9 Sweet Gelato Dye Ink
Shop at:
 Wplus9 Sea Breeze Dye Ink
Shop at:
Wplus9 Sea Breeze Dye Ink
Shop at:
 WPlus9 Ocean Drive Dye Ink
Shop at:
WPlus9 Ocean Drive Dye Ink
Shop at:
 Spellbinders Platinum 6 Die Cutting Machine
Shop at:
Spellbinders Platinum 6 Die Cutting Machine
Shop at:
 Simon Says Stamp Intense Black Ink Pad
Shop at:
Simon Says Stamp Intense Black Ink Pad
Shop at:
 Simon Says Stamp Vellum
Shop at:
Simon Says Stamp Vellum
Shop at:
 Neenah 80 Solar White Paper Pack 250 Sheets
Shop at:
Neenah 80 Solar White Paper Pack 250 Sheets
Shop at:
 Sakura Quickie Glue Pen
Shop at:
Sakura Quickie Glue Pen
Shop at:
") Pretty Pink Posh 4MM Clear Droplets (small)
Shop at:
Pretty Pink Posh 4MM Clear Droplets (small)
Shop at:
") Pretty Pink Posh 6MM Clear Droplets (medium)
Shop at:
Pretty Pink Posh 6MM Clear Droplets (medium)
Shop at:
 Best Creation Big Squares 3D Foam Tape Adhesive
Shop at:
Best Creation Big Squares 3D Foam Tape Adhesive
Shop at:
 Martha Stewart Mini Scoring Board
Shop at:
Martha Stewart Mini Scoring Board
Shop at:
 Be Creative Tape 3mm Sookwang
Shop at:
Be Creative Tape 3mm Sookwang
Shop at: